
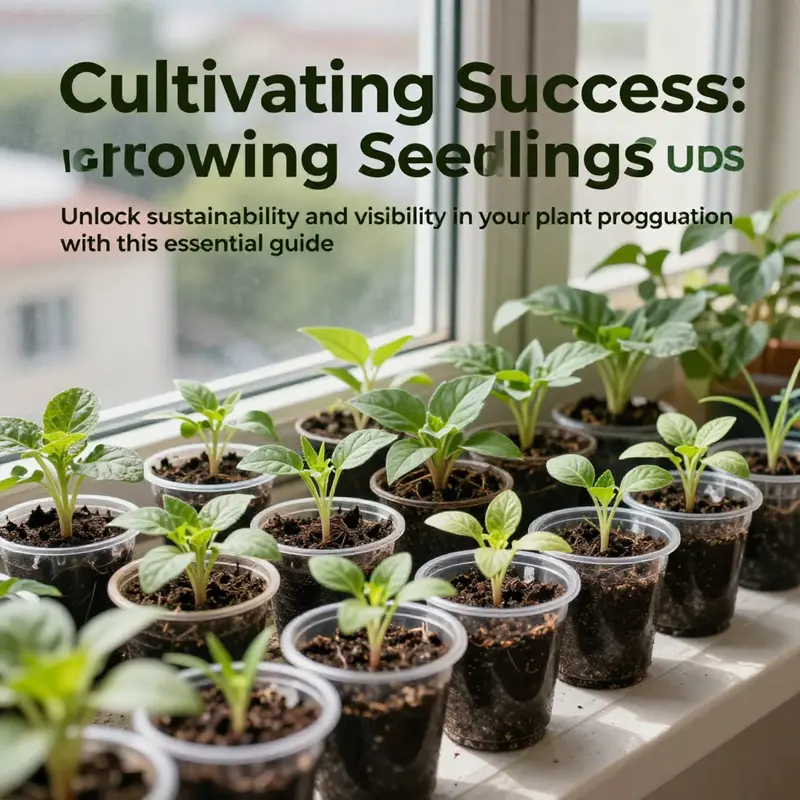
For bubble tea shops, restaurants, and catering services, integrating fresh, home-grown herbs and vegetables can enhance your offerings while aligning with sustainable practices. Growing seedlings in clear plastic cups is an innovative, resourceful technique that not only serves as a practical gardening method but also engages your audience and provides a learning opportunity for staff and clients alike. This guide will walk you through the step-by-step process of growing seedlings, detail the advantages of using clear plastic cups, outline common plants that thrive in this setup, and give you essential tips for successful transplanting, ensuring your ventures into gardening are fruitful and cost-effective.
Clear Cup Propagation: Seeds, Roots, and Windowsill Growth
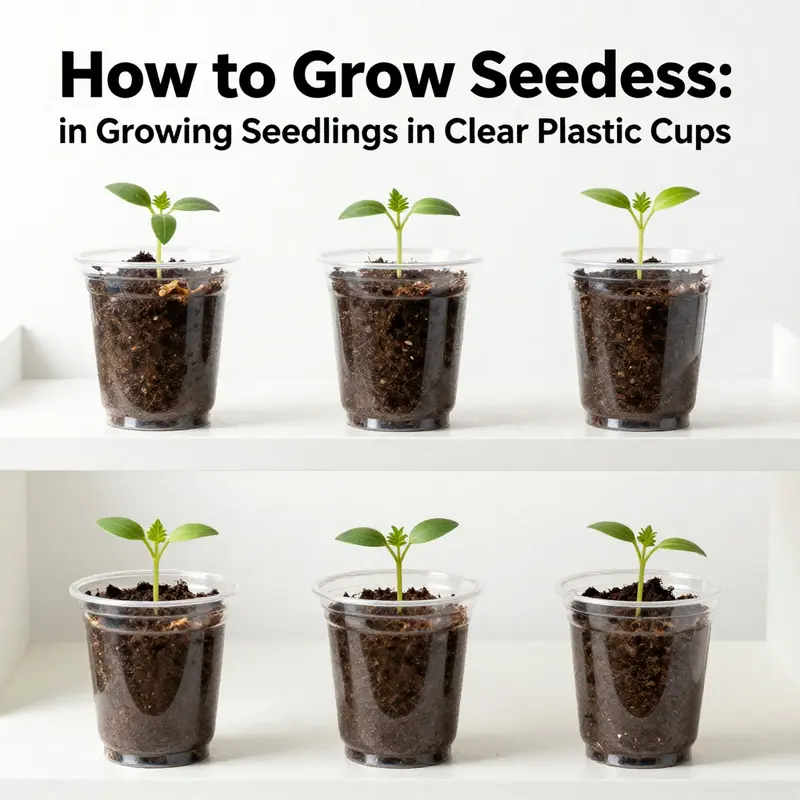
A simple clear plastic cup can become a window into the early life of a plant. Placed on a sunny sill, it acts as a tiny greenhouse that reveals the rhythm of germination, root formation, and the emergence of the first leaves. For beginners, urban gardeners, or classroom projects, this method offers an inexpensive way to observe plant biology in real time. The transparency helps you see how seeds swell, crack, and send out roots before the shoot reaches for light.
The setup is deliberately simple. Use clean, tall cups that leave room for roots to grow. Add a well draining starting mix and moisten it to be damp but not soggy. Small holes in the bottom provide drainage to prevent water from sitting in the root zone while still allowing air to circulate. Label each cup with the seed type and sowing date to keep track as you watch progress.
Sowing can be tailored to seed size. Tiny seeds like lettuce or basil may be placed two to a cup for observation, while larger seeds such as beans or peas may do fine one per cup. Gently cover with a light layer of soil and keep the surface moist with a soft spray. Place cups on a tray to catch excess moisture and to keep your workspace tidy.
Light and warmth are the engines of germination. Most seeds germinate best with bright light and a stable temperature around 65 to 75 degrees Fahrenheit. A sunny windowsill or a compact grow light works well. If leaves look pale or plants become leggy, adjust the light to bring the plant closer and provide steadier illumination. When true leaves appear, consider transplanting to a larger pot to continue healthy growth.
Beyond growing plants, the clear cup offers a chance to observe root behavior and soil moisture dynamics. You can note how roots seek pockets of air, how the soil dries and re-wets, and how the plant responds to daily care. The cup becomes a small hands on classroom that teaches patience, observation, and simple plant care. If resources allow, you can reuse the cups after transplanting, making the approach a small but meaningful step toward sustainable gardening.
For further grounding, additional reading on seed biology and germination can deepen understanding and support your experiments. Look for reputable extension or university resources that describe core concepts and practical tips for growing from seeds. A well chosen external reference can connect what you observe in your cups to broader plant science and gardening best practices.
Seeing Roots, Growing Confidence: The Practical Advantages of Clear Plastic Cups for Seedlings
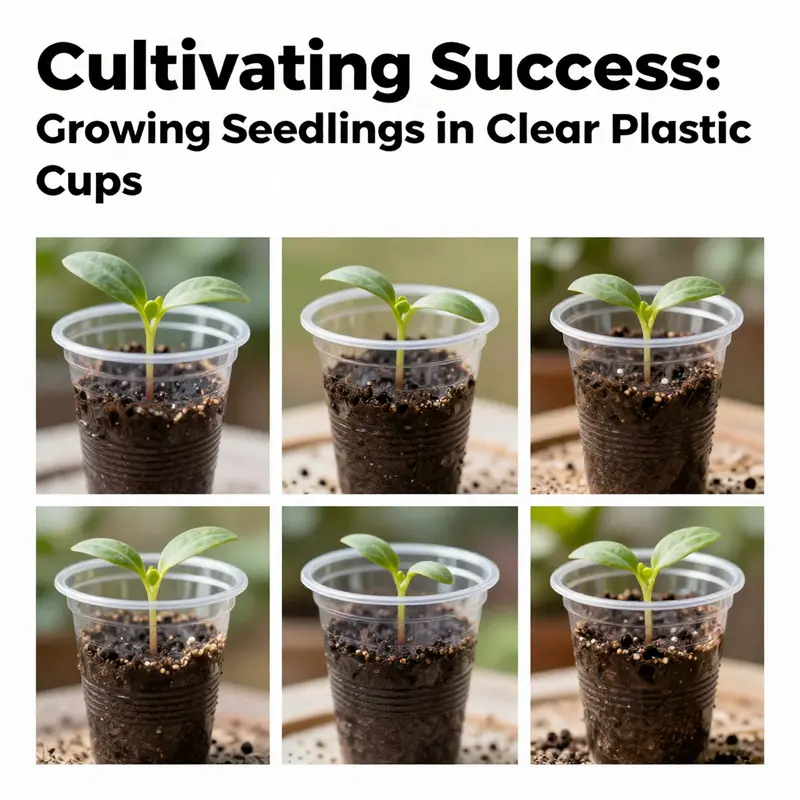
Growing seedlings in clear plastic cups may feel deceptively simple, but the method carries a set of advantages that can transform the early stages of a grow-infection into a smooth, observable, and affordable process. The transparency of the container becomes more than a gimmick; it turns the act of nurturing a tiny plant into an interactive observation project. You can watch the seed germinate, track the emergence and growth of the initial roots, and notice subtle changes in the root architecture that often sway decisions about watering, light, and transplant timing. In a sense, the cup acts as a tiny biological lab, allowing you to confirm that what you see above the soil reliably reflects what is happening below. This visibility matters not only for novices who are building confidence but also for students who are learning plant physiology in real time. When roots are visible, signs of stress such as early root rot, overwatering, or a root-bound condition appear sooner, enabling timely interventions that protect the entire crop from a slow, silent decline. It is this clarity of diagnosis—root as well as stem—that makes clear cups more than a convenience; they become a diagnostic ally for careful growers.
For many, the appeal starts with cost and accessibility. Clear plastic cups are inexpensive, widely available, and easy to source from household waste streams or local programs. A budget-conscious home gardener or a classroom project can begin with a handful of cups scraped from day-to-day life, washed clean, and repurposed for seedStarting. The low barrier to entry is not simply about money; it is about democratizing access to hands-on growing experiences. The visual feedback from the cup—seeing roots stretch and branch as the soil maintains moisture—offers a compelling, low-stakes learning curve. This practical accessibility pairs well with the fact that these cups are highly portable and stackable. If a tray of experiments is needed for a school day, the compact, uniform shape of these cups makes them easy to assemble, store, and transport, reducing logistical friction while you focus on the science of germination and early seedling vigor.
The third advantage that often goes overlooked is the light transmission offered by clear cups. The material’s transparency allows light to penetrate toward the center of the root zone, which can complement healthy photosynthesis in the upper parts of the plant, especially when placement is near a bright window or under grow lights. The effect may be modest at first, but for seedlings in the earliest days, every photon matters. Adequate light supports robust shoot development, which in turn helps the plant sustain the energy demands of rapid root growth. This is particularly relevant in indoor or semi-controlled environments where natural light may be intermittent. In such settings, the cup’s clarity helps you position seedlings with better light balance and minimizes the need for constant rearrangement to chase the sun throughout the day.
Moisture management is another domain where the clear cup proves its worth. Plastic cups are effectively impermeable to most water loss through evaporation in the sides, which helps maintain stable moisture around the root zone during the critical germination phase. This consistency reduces the frequency of daily checks and watering events—a boon for busy schedules and for gardens with many seedlings in play. Yet this same impermeability can be a double-edged sword. Without proper drainage and careful attention to substrate moisture, water can accumulate and create anaerobic pockets that stress seeds or invite rot. The practical solution lies in a simple, deliberate setup: drill a few drainage holes in the bottom, place a moisture-absorbent layer such as a paper towel or cotton pad at the base to wick excess moisture, and select a well-draining potting mix. The goal is a seed-to-root environment that remains moist enough to encourage germination but not so saturated that roots drown. This balanced approach is exactly where the cup’s transparency aids, because you can observe moisture distribution at the soil surface and, more importantly, watch for any changes in the root zone’s appearance as roots begin to colonize the media.
Hygiene and sanitation are often overlooked as practical advantages until their absence becomes obvious. Clear plastic cups can be sterilized or cleaned with relative ease, which lowers the risk of soil-borne pathogens stealing a seedling’s first days. The ability to sterilize or sanitize a container is more than a procedural convenience; it is a pathway to higher survival rates during the vulnerable seedling stage. In scientific contexts, researchers routinely reuse or sanitize transparent cups to maintain experimental integrity and reduce contamination. A straightforward approach—washing thoroughly, then sterilizing with a 70%–75% alcohol solution or other validated sanitizers—helps create a clean starting point for each batch of seedlings. Sterilization is not just a safeguard; it helps maintain consistent seedling vigor across dozens or hundreds of plants, particularly in educational settings or small-scale propagation operations. The practical implication is clear: with proper hygiene, clear cups can support more reliable outcomes, making them an appealing option for both novices and more experienced growers who value consistency.
In addition to the raw practicality, the design and form of clear cups provide a natural compatibility with routine greenhouse or windowsill setups. Their portability and uniform shape make them easy to stage in rows, align under artificial lighting, and swap between shading and sun as the day progresses. The stackability reduces storage space in teaching labs or home environments where space is at a premium. When you combine portability with the possibility of reuse, the cups become more than a one-time disposable item; they can function as a modular starting system that travels with your plants from germination to the next phase of growth. The idea of reuse is particularly compelling in educational contexts and community gardens where budgets are tight and sustainability matters. Repurposing household containers into productive growing tools reinforces a practical ethic: materials in our daily lives can be repurposed into living systems that teach, feed, or beautify.
The scope of what a clear cup can support extends beyond basic seed starting. Students and hobbyists often push the format into more ambitious experiments, including grafting or niche propagation. For advanced practitioners, the cup can be transformed into a mini greenhouse by temporarily lifting the bottom and inverting it over a graft site to trap humidity. While such techniques demand careful handling and a controlled environment, they illustrate how flexible the medium can be when paired with an informed approach to microclimate creation. Even when not venturing into grafting, the cup’s microclimate can be tuned by adjusting the environment—placing seedlings in a bright, but not scorching, location; ensuring consistent but not blasting airflow; and monitoring humidity through the soil surface and the cup walls. The combined effect is a reliable framework for nurturing young plants through their most delicate phase while preserving the chance to observe, adjust, and learn.
The practical steps that accompany this approach reinforce the advantages already discussed. Begin with a simple preparation: wash the cups, sterilize if desired, and drill a few small drainage holes in the bottom. Layer a paper towel or cotton pad to help wick moisture and prevent soil from clogging the drainage holes. Fill with a light, well-draining potting mix, then place your seeds at the recommended depth. Water gently, aiming for a damp but not soggy substrate. Position the cups in a warm, well-lit location—ideally where daytime temperatures stay within the range conducive to the plant species you are growing. From there, daily observation becomes both a discipline and a joy. You can track moisture levels by observing the soil surface, monitor root emergence visually, and note how quickly the plant responds to tweaks in light or watering. Each cup becomes a tiny narrative of growth, a tangible record of how a seed transforms into a seedling under your care.
Transplanting is where the advantages of the clear cup really shine. Once seedlings showcase their first true leaves and have developed a robust root system, you can transplant them with minimal disturbance by cutting away the cup around the roots and gently lifting the plug into a larger pot or directly into the garden. The root ball remains largely intact within the soil and cup, reducing transplant shock and preserving the root network’s integrity. This is especially valuable for small-space propagation or for teaching contexts where students need to witness successful transitions from a controlled environment to a more expansive growing area. The plug-and-go approach keeps seedling culture simple, while still allowing for robust growth in the next stage. While this method works across many species, it is particularly forgiving for vegetables like tomatoes or beans, where early vigor translates into a productive canopy later in the season. The cup, once again, acts as a discreet catalyst for a smooth progression from germination to transplant, offering a bridge between controlled conditions and outdoor resilience.
Despite these clear benefits, the method is not without limits. The most persistent drawback is restricted airflow compared with open pots or fabric containers, which can contribute to damp air around the crown and, in some cases, fungal issues if humidity remains consistently high. To counter this, practitioners often introduce gentle ventilation by loosening the lid if a lid is used, ensuring occasional air exchange, or opting for cups with slight venting, while still preserving moisture in the root zone. Direct sun exposure should be avoided, since clear plastic can magnify heat and potentially cook the delicate roots or heat the container more than the soil beneath, especially on bright days. The recommendations here are straightforward: place cups in bright, indirect light, rotate them to balance exposure, and keep an eye on surface moisture and cup temperature. When a hotter day arrives, move the cups to a cooler, shaded location for part of the day or provide a breathable covering that still allows light to reach the plant. The broader lesson is simple: the transparency that helps you observe growth also requires careful stewardship to prevent overheating or drying extremes from harming seedlings.
Finally, the broader implications of using clear cups flow into sustainability and pedagogy. The approach aligns well with a hands-on, inquiry-driven learning style, inviting questions like how much light is enough, what root structure looks like at different stages, and how plants respond to varying moisture regimes. It also dovetails with sustainability goals when cups are cleaned and reused or repurposed from recycling streams. The ability to observe while learning makes this method a powerful educational tool, reinforcing the idea that science and gardening can be practiced with accessible materials and thoughtful care. The chapter you are building toward—how to grow seedlings effectively with clear cups—rests on a clear chain: observe, adjust, transplant, and continue to nurture. It is a cycle that rewards careful attention and disciplined routines, turning a simple cup into a practical stepping stone toward healthy, thriving plants.
For readers who want to see comparable practices in a formal research context, the literature confirms the hygiene and observation advantages discussed here. Sterilization of transparent plastic cups used in plant research demonstrates how straightforward cleaning and sanitization can improve seedling survival by minimizing pathogen exposure. The broader takeaway is that clear cups offer a reliable platform for early-stage plant care when paired with disciplined sanitation and mindful climate control. If you are curious about the scientific basis for these practices or want to explore related methodologies, a detailed resource on cup sterilization provides a rigorous backdrop to the everyday gardening insights described above. External resources exist that outline best practices for maintaining sterile conditions in plant experiments and the practical steps researchers take to protect young plants while using transparent containers.
As you weigh options for starting seedlings, consider the combined advantages of visibility, accessibility, light transmission, moisture stability, sanitation potential, and portability that clear plastic cups provide. These features come together to create a planting system that is not merely practical but genuinely educational. The cup invites you to look closely at the life that begins in a seed, to notice the signs of vigor or distress, and to respond with informed care. It invites you to cultivate, day by day, a habit of observation that translates into healthier transplants and a more confident gardener. The approach proves that you do not need a high-tech setup to achieve reliable results; with a transparent cup, a modest amount of soil, some patience, and a watchful eye, you can grow seedlings that are robust, ready for transplant, and ready to thrive in their next stage of life.
For further reading on the practical aspects of sterilization, you can consult peer-reviewed guidance on the topic, which supports the idea that simple sanitization enhances seedling survival rates in controlled experiments. In practice, adopting a routine of careful cleaning, moisture management, and mindful light exposure will help you unlock the full potential of clear cups as a seed-starting tool. A single, well-managed batch can become a reliable template for future projects, enabling you to scale up with confidence and reuse the same clear cups across multiple planting cycles. As you experiment, you will likely discover nuances specific to your plant species, your climate, and your space. The beauty of the method lies in its adaptability: the same transparent container that reveals the roots can be tuned by your decisions about moisture, light, air exchange, and transplant timing to produce strong, healthy seedlings.
Internal link for practical context: Disposable single-wall food-grade cup for wine and soup offers a related example of how similar cup-based systems are used in everyday settings, illustrating the broader principle that cups—whether for gardening or catering—are versatile containers that can be adapted to various purposes with appropriate handling and design thinking.
External resource for deeper understanding: a detailed, peer-reviewed resource on sterilization and transparent cups for plant research provides rigorous support for the hygiene practices discussed here. See https://www.jove.com/t/57879/sterilization-of-transparent-plastic-cups-for-plant-research for a comprehensive exploration of these techniques and their role in improving plant survival during early growth stages.
Seeing Roots, Growing Futures: Mastering Seedlings in Clear Plastic Cups
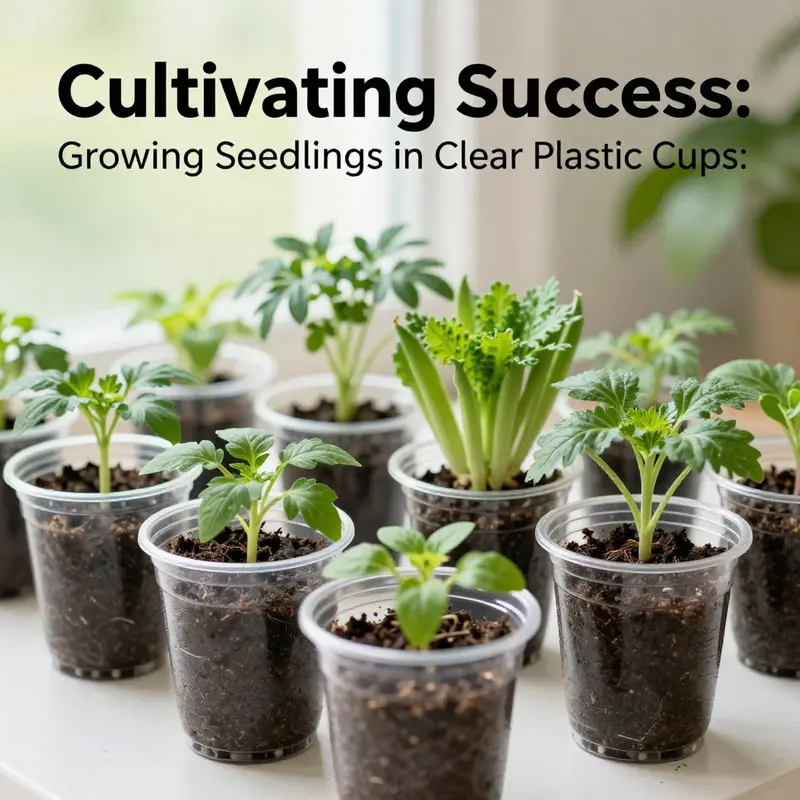
Clear plastic cups offer a window into seedling development. Their transparent walls let you monitor moisture, root growth, and the emergence of first true leaves. A small cup with drainage holes helps prevent waterlogging and keeps roots healthy. Use a light, well-draining soil mix so roots can breathe and you can transplant later without damage. Because the container is shallow, monitor surface dryness and avoid letting the soil stay consistently wet. For germination, you can place seeds between a damp paper towel and the cup wall to observe rooting without disturbing the seed. You can also create a mini humidity tent by loosely covering the cup with a lid to slow water loss during early germination. As seedlings grow, transplant when the root ball fills the lower part of the cup, taking care to minimize root disturbance by gently removing the cup or pushing the soil plug out intact. Harden off gradually before exposing to outdoor conditions. The cup method is economical, reusable, and a practical learning tool for classrooms and home gardens. It invites experiment, encourages careful observation, and helps you track how light, moisture, and air affect growth.
From Cup to Garden: Mastering Transplanting Seedlings Grown in Clear Plastic Cups
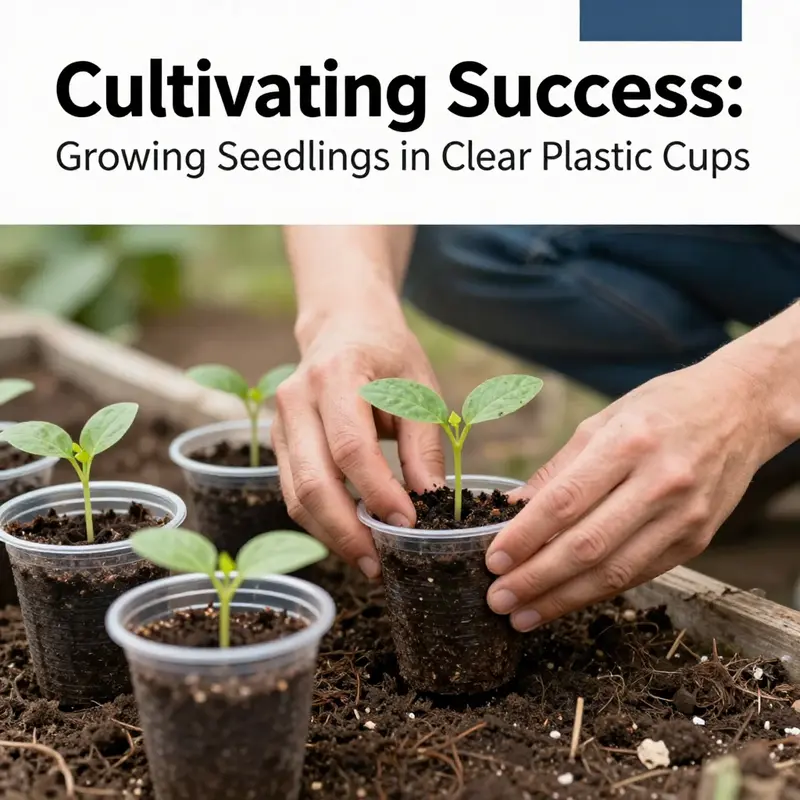
Watching a seedling move from the quiet confines of a clear plastic cup to a larger world is more than a simple relocation. It is a careful negotiation between the plant’s needs and the gardener’s timing, a moment when patience, observation, and gentle hands come together to ensure a successful start in a new environment. The transparent walls of the cup, while serving as a vivid classroom during the early stages of growth, also pose practical considerations when the time to transplant finally arrives. The root system, visible through the sides, becomes both a guide and a potential risk: a root ball that is too tightly bound or roots that have dried out can undermine the seedling’s post-transplant vigor. Yet when approached with a steady plan, the cup can remain a valuable bridge between germination and a thriving, established plant in the garden or a larger pot.
The core idea behind transplanting from clear cups is straightforward: move the seedling with minimal root disturbance, plant at an appropriate depth, and protect it during the initial acclimation period. In a home-garden setting, this approach is attractive because it is economical, marker-light in terms of materials, and easy to manage for both beginners and seasoned growers. It also doubles as a powerful visual lesson. Because the cup is transparent, you can observe how the seedling’s root system explores the surrounding soil as soon as it is placed into a new medium. You can note moisture patterns, the development of new roots, and even early signs of stress that might otherwise go unnoticed in an opaque container. That visibility translates into smarter care decisions—how deeply to plant, how much to water, and when to shield the seedling from sudden temperature swings.
Yet visibility is a double-edged sword. The same clarity that reveals root growth can also expose a seedling to overheating, rapid moisture loss, or sunburn if the transplant is rushed into a blazing afternoon or an exposed site. The main objective is to orchestrate a smooth transition from a cup to a more durable rooting environment, where the plant can establish itself with robust growth. The process begins well before you lift the seedling from its plastic cradle. The preparation of the new site is as much about timing as it is about the physical space you create. You want a site that offers adequate drainage, suitable light for the crop, and a soil or potting mix that supports continued root expansion without compaction. For most vegetables and greens, a loose, well-draining mix with a balanced nutrient content is ideal. If you are transplanting into the ground, prepare the bed by loosening the soil to a depth of several inches and removing any crusted patches that could impede water movement. If you’re moving into a larger pot, choose a container that is at least twice the volume of the cup, with drainage holes that won’t clog as the plant grows.
Timing is a critical factor, almost as important as the physical act of lifting. Transplant when the seedling has at least two true leaves and a sturdy, well-developed root system that can withstand the slight disruption of transfer. This is when the plant has demonstrated its initial adaptation to the cup environment and ready to push into growth again in a new space. Transplanting during a period of extreme heat, heavy rain, or strong winds should be avoided. The goal is to minimize stress, not to maximize speed. This is why the hardening-off phase—traditionally associated with acclimating plants to outdoor conditions—becomes relevant even when you are simply moving from cup to ground or a larger pot. A week or so of gradual exposure to outdoor conditions, particularly in a shaded area, helps the seedling prepare for the new environment outside the cup. Over the course of seven to ten days, you can gradually increase sun exposure and wind, always watching for signs of stress such as curling, sunburned leaves, or a drooping habit that persists after the plant has had time to adjust.
The actual removal from the cup should be done with care and a touch of gentleness. The goal is to minimize root disturbance while ensuring the seedling is free from the cup’s sides. In many cases, turning the cup upside down and giving a light tap on the bottom helps release the plant without yanking. If the roots are densely wrapped and look bound, you can lightly loosen the outer root ball with your fingers, tracing along the edges to encourage outward growth rather than inward circling. For very small seedlings, it is often easiest to cut away the cup carefully after the plant is out, exposing a compact root system that can be placed directly into the prepared hole or pot. The method you choose should preserve the integrity of the root mass while ensuring the plant is oriented correctly in its new home.
Planting depth is another key variable. In most cases, you should plant the seedling at the same depth it was growing in the cup. The stem should be upright and the crown just above the soil line. For crops with robust stems, such as certain tomatoes, you can bury part of the stem to encourage additional root formation; this should be done sparingly and only when the stem is sturdy enough to support the extra root system without collapsing. Burying too deeply or burying a delicate stem can invite rot or stem-related problems, so observe the plant’s vigor and proceed with caution. After placement, the soil around the seedling should be gently firmed with a light touch to remove air pockets without compacting the soil. A gentle watering right after planting helps settle the soil, seals the root-soil contact, and reduces the risk of transplant shock.
A bright, even moisture regime follows the initial transplanting. The transparent cups show you moisture levels vividly; you can see whether the surface remains evenly moist or if the soil dries out in the top few centimeters, which is often the first place to observe moisture deficits. The temptation to overwater is strong because the cup’s clear walls encourage you to check the soil visually and maintain a consistent level of dampness. The reality, however, is that the key is steady moisture, not saturation. Water thoroughly after transplanting to settle the soil around the roots and to help eliminate air pockets, then allow the top layer to dry slightly before watering again. The frequency will depend on climate, potting mix, and plant type. In hot, dry conditions, you may need to water more frequently, but always ensure that the water drains away and does not pool at the bottom where roots may rot.
The cup’s transparency also invites thoughtful microclimate management. In the days immediately after transplanting, the plant benefits from a little extra humidity, which helps reduce water loss from the leaves and can dampen the shock of the move. A light mulch on the soil surface can help regulate moisture, deter weed competition, and moderate soil temperature. If you live in a region with intense sun or strong winds, a simple shade cloth or a temporary canopy that reduces direct sun for the first few days can protect the seedling while it acclimates. It is not about sheltering the plant from light indefinitely; it is about giving it a gentler transition that supports root establishment and foliar recovery. Over the next week or two, monitor the plant for signs of stress—wilting that doesn’t subside after watering, yellowing leaves, or new growth that remains pale or stunted. Most seedlings recover quickly from transplant shock when these clues are addressed with appropriate watering,-placement adjustment, and a little shade when needed.
Watching the rooted growth through the cup, you can also gauge a plant’s readiness for bigger steps. As soon as the seedling has established a robust root system and shows vigorous new growth, you can proceed to transplant into a garden bed or a larger pot. The cup serves as a temporary nursery, and its use makes the transition simpler by reducing root disturbance during the move. The practice of using the cup as a growing plug is particularly advantageous for educational settings, where the root development is visible to students, providing a tangible link between germination, transplanting, and long-term growth. It is a demonstration of how a plant responds to a change in environment, how roots explore new soil volumes, and how careful handling can support a healthy transition rather than trigger a setback.
In more advanced contexts, those same clear cups can be leveraged as small-scale grafting aids, where the cup is inverted to create a humid microenvironment that encourages graft union formation. While grafting itself demands precise technique and a supportive microclimate, the cup’s role as a mini greenhouse underscores the broader idea that simple, low-cost containers can be repurposed to enhance plant propagation workflows rather than just seedling production. This versatility—rooted in visibility, ease of use, and gentle manipulation—helps explain why many gardeners embrace clear cups as a staple in early-stage propagation.
A practical note on the bottom of the cup also merits attention. Some growers place a paper towel or cotton pad at the base before adding soil. This simple addition can help wick moisture and maintain uniform moisture distribution along the root zone, which is particularly helpful for seedlings with fine roots that might otherwise dry out unevenly. It also provides a cushion that can make removal a bit more forgiving if the seedling needs to be relocated again before final planting. Of course, each crop has its own quirks. Leafy greens may tolerate a somewhat drier profile in their early days, while peppers and tomatoes often benefit from a slightly more consistent moisture environment as they push through the critical first true leaves and establish robust vigor.
The overarching takeaway is that transplanting from a clear plastic cup is about balance. You balance visibility with protection, speed with caution, and the cup’s compact convenience with the longer-term goals of the plant. You balance the plant’s need for root expansion with the gardener’s need to minimize stress and maximize establishment. And you balance method with observation. The cup is not a final home; it is a transitional space that can be optimized through careful handling, thoughtful timing, and a light touch. When you consider the process as a sequence of small, deliberate actions rather than a single leap, the act of moving a seedling from cup to bed becomes a learned practice rather than a leap of faith.
In practical terms, you can integrate this approach into a broader propagation workflow without losing sight of the plant’s overall life cycle. For beginners, starting in clear cups reduces the guesswork about seedling vitality, offering a window into root development that informs later decisions about timing and placement. For more experienced gardeners, it provides a modular approach to nursery management: seedling production in a controlled cup environment, careful acclimation during hardening off, and a staged introduction to the garden or larger containers. The result is a propagation system that is reproducible, educative, and scalable, with the potential to reduce transplant shock and improve early growth performance while keeping costs modest and materials accessible.
As you finalize your transplant plan, keep in mind that the science behind best practices is supported by established resources that synthesize field experience with horticultural research. The lines between classroom observation and field application blur when you adopt the cup-based approach as a practical, repeatable step in a broader cultivation plan. By maintaining a steady eye on moisture, root health, and environmental conditions, you give your seedlings the best possible start. The transparent cup becomes a guiding tool, not a constraint, shaping how you observe, decide, and respond to the plant’s needs as it moves toward a more expansive life in soil or a larger container. When your garden bed finally receives these little plants, their early days in the cup will have already taught them resilience, a habit of steady growth, and an appreciation for the careful attention that such simple tools demand.
For readers seeking to connect these practical steps with a broader, science-based framework, detailed transplanting guidelines are available from reputable university resources. These guidelines offer deeper exploration of timing, site preparation, and post-transplant care, complementing the hands-on approach described here and helping ensure that your seedlings not only survive but thrive after their move from cup to garden. In the spirit of evidence-based gardening, integrating such guidelines can elevate a straightforward propagation technique into a robust, reliable practice that supports sustainable home gardening and productive school projects alike. For a comprehensive, science-backed reference, see UC ANR’s transplanting guide, which provides detailed, research-informed recommendations for home gardeners and agricultural professionals alike. Source: UC ANR Transplanting Seedlings.
Internal link: If you are curious about how everyday disposable containers can still support thoughtful, small-scale propagation tasks, you can explore further in this related post that discusses affordable, accessible cups and related materials. 8oz plastic-free craft paper cups. This resource isn’t a replacement for horticultural guidance, but it reflects a practical mindset: materials don’t have to be specialized to support thoughtful gardening practices. They can be repurposed, repurposed again, and used with intention to minimize waste while nurturing living plants across cycles of growth.
In sum, transplanting seedlings grown in clear plastic cups is a disciplined, adaptable practice that rewards patience and attentiveness. When done with careful preparation, proper timing, and a light, observation-driven touch, the cup marks a meaningful transition—one that carries forward the seedling’s promise into the larger, more forgiving world of soil and sun. The lessons learned in this simple micro-environment—about moisture, root development, and the delicacy of early growth—form a foundation for confident, resilient gardening. The cup, once a temporary cradle, becomes a testament to how everyday materials can play a pivotal role in nurturing life from seed to sprout and beyond.
Final thoughts
Utilizing clear plastic cups for growing seedlings not only presents an eco-friendly solution for sourcing fresh ingredients but also fosters a deeper connection to nature for your staff and clients. With the step-by-step guidance provided, advantages laid out, and transplanting techniques explained, your establishment can embrace sustainable practices that are visually appealing and beneficial for culinary creativity. Start your journey towards greener operations today, one seedling at a time.