
Maintaining hygiene in your beverage service is crucial, not just for aesthetics but for customer safety and satisfaction. Mold on plastic cups can impact your brand’s reputation and affect the quality of beverages served. In this guide, we explore effective methods to clean mold off plastic cups that are perfect for bubble tea shops, restaurants, food trucks, and catering services alike. Each chapter will delve into a specific cleaning technique, starting with the vinegar soak method, followed by baking soda scrubbing, and concluding with the benefits of sunlight and alcohol for final disinfection. Together, these methods will equip your team to tackle mold challenges effectively, ensuring your plastic cups remain pristine and inviting.
The Vinegar-Soak Strategy: Restoring Moldy Plastic Cups and Their Gasketed Lids
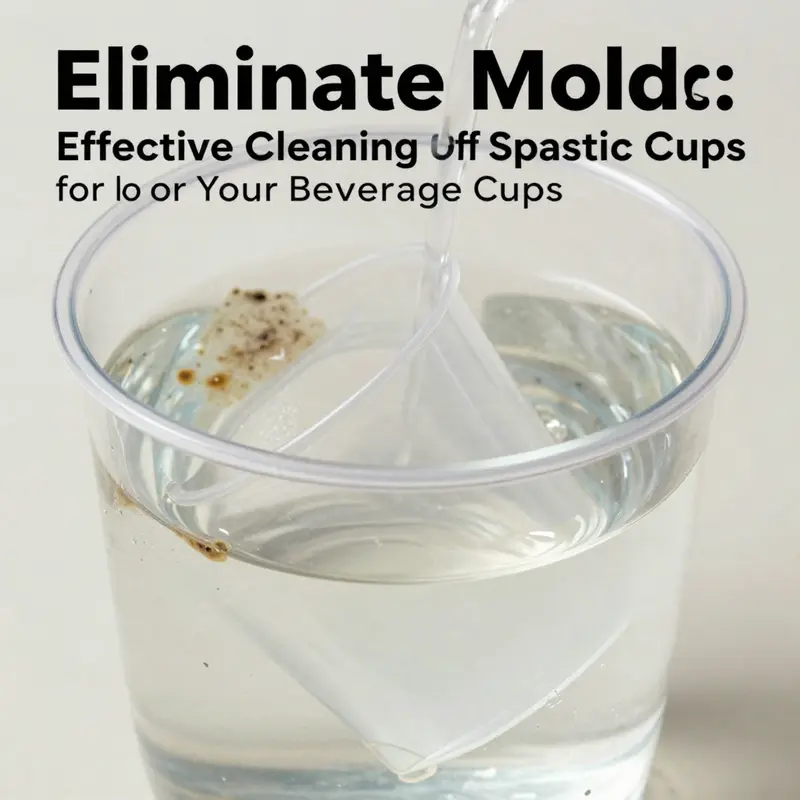
Mold is a stubborn companion in kitchens, especially in the everyday objects we reach for without a second thought. Plastic cups are convenient, affordable, and dishwasher-friendly, but their low-cost design can harbor tiny ecosystems of mold when moisture lingers in cracks, crevices, and seals. The goal is not merely to hide the problem with a quick rinse, but to restore the cup to a clean, safe state and to reduce the chances that mold returns. The vinegar-soak method emerges from practical know-how: a simple, accessible routine that relies on a common kitchen staple to break down mold spores, soften organic residue, and neutralize odors. When you approach mold on a plastic cup with patience and a clear sequence, the result is not only a visually clean surface but a safer and more confident cup for everyday use. The journey centers on the gasketed lid, a tiny component that tends to trap moisture, microbes, and the stubborn corners where a soft material like silicone hides its own microenvironment. By treating the lid and its gasket with the same care as the cup body, you address a frequent source of lingering smells and renewed growth, ensuring the entire assembly dries thoroughly and remains ready for the next refill.
The process begins with a deliberate separation of the lid from the cup. It is tempting to rush past this step, but the gasket, the inner plug, and the cap’s housing are all likely to accumulate mold if left sealed around a damp interior. Removing the outer cap, extracting the inner plug, and gently lifting the silicone gasket exposes the parts most susceptible to harboring spores. The silicone gasket is a soft, pliable barrier that seals in flavor and moisture, but its porous corners and edges can collect biofilm where a simple wipe does not reach. Handling this piece with a gentle touch preserves the gasket’s integrity while making it possible to treat every surface equally. This careful disassembly is not a chore; it is an essential step toward thorough cleaning and reliable dry storage later on.
Next comes the soaking solution, a precise, repeatable ritual of equal parts white vinegar and warm water. The acetic acid in vinegar has a dual role: it disrupts biofilms that form on plastic’s micro-scratches and crevices, and it helps neutralize odors that cling to plastics long after a rinse. Warm water enhances the penetration of the solution into microscopic pores and swells any organic residue that clings to the gasket and cap. As the parts sit in this gentle bath, the vinegar begins to work on hidden films that ordinary rinsing would miss. This is a surface-cleaning approach at a molecular scale, yet the soak remains straightforward enough for a busy kitchen routine. The duration—at least half an hour, and up to an hour for particularly stubborn cases—gives the solution time to act without risking any adverse reaction with the plastic or the gasket.
When the soak is complete, the scrubbing phase follows as a careful, tactile step. A soft-bristled brush or a toothbrush lets you reach into the small crevices around the gasket, the inner plug, and any ridges along the cap’s interior. The goal is not to scour aggressively but to dislodge loosened residue and any residual biofilm without abrading the silicone or the plastic. The gentle circular motions used during scrubbing complement the chemical action of the vinegar soak. As you scrub, you’ll notice the mold’s darkened edges begin to soften, and faint odors wane in the wake of the clean surface below. This stage emphasizes precision over brute force; the best cleaning compounds rely on access and contact rather than raw abrasion to preserve the lifetimes of silicone and plastic.
Rinsing follows, a thorough, deliberate rinse with clean water to remove all vinegar traces and loosened debris. It’s worth spending extra attention here because lingering acidity or residual particles can obscure the final assessment of cleanliness. A final rinse with clear water ensures the gasket, inner plug, and outer cap look and feel as fresh as the day they were first purchased. After rinsing, air drying becomes the last and most important act. Placing all components on a clean, dry surface in a sunny, ventilated spot—or simply a well-lit kitchen area—lets air circulate around every edge and crevice. The critical component here is time; surface dryness is one thing, but complete dryness across the gasket’s inner corners and the cap’s underside is what prevents regrowth. Mold thrives on even a trace of dampness, and the best way to thwart it is to ensure nothing remains moist where it can reestablish itself.
The effectiveness of the vinegar soak rests on three pillars: safety, surface compatibility, and simplicity. Acetic acid is capable of dissolving residues and loosening biofilms on many plastic surfaces, but it is also gentle enough to be used on most non-bleach plastics when applied in the correct concentration and with proper rinsing. This method avoids harsher chemicals that could degrade plastic over time or leach substances into beverages. Bleach, while a powerful disinfectant, can gray or degrade certain plastics and may interact unfavorably with dyes or pigments used in lids and seals. The vinegar soak therefore offers a balanced approach that aligns with a home-use routine: it works, it’s relatively safe, and it is accessible to most households without special equipment.
A practical note about drying follows naturally from the discussion of effectiveness. The principle is simple: moisture is the primary driver of mold regrowth. Even after a thorough cleaning, if any component remains damp, mold can return. A good habit is to place the parts in an uncluttered space where air can circulate freely, rather than in a closed cupboard that traps humidity. The gasket and cap work best if they are laid out in a way that allows the silicone to air dry completely without folding, creasing, or trapping moisture in a seam. You may even consider giving the inside of the cup a quick wipe and leaving the cup inverted on a rack to ensure any residual moisture from the interior evaporates fully as well. When every piece feels dry to the touch, reassembly can proceed with confidence. A dry reassembled lid offers not only a cleaner look but a more reliable seal that resists dampness and potential microbial growth during normal use.
Beyond the vinegar soak, the literature supports a few complementary approaches that can enhance results, especially when mold is persistent or when odors linger. A baking soda scrub, for instance, provides mild abrasive action that physically removes mold on smooth surfaces and can brighten the appearance of dull stains. A paste of baking soda and water, applied directly to moldy spots and agitated with a small brush, can lift residual residue that the soak alone might not fully remove. This step is best used after the initial vinegar soak and scrubbing, as the baking soda’s gentle abrasiveness helps dislodge stubborn films without scratching plastics. Following up with a thorough rinse helps ensure no gritty residue remains that could affect taste or odor.
Sunlight exposure represents a natural, low-tech disinfection complement. Placing the cleaned cup in direct sunlight for several hours leverages UV rays to diminish surface mold spores on exposed areas. This is particularly useful for cups that are stored in sunlit cupboards or on windowsills where light reaches more directly. A caveat applies: some plastics, especially heat-sensitive varieties, can warp or discolor with prolonged sun exposure. If a cup or lid shows any signs of warping, fading, or distortion, it is wise to shorten the sun exposure or skip it altogether and rely on air drying plus sanitizing steps instead. The third leg of the triad—alcohol wipes—offers a final, rapid disinfection. Wiping the interior and exterior surfaces with a cloth or cotton ball dampened with 75% isopropyl alcohol provides an evaporative disinfectant that leaves little residue and helps remove any remaining organic matter from crevices. Alcohol works well as a post-cleaning wipe to give the surface a fresh, sanitizer feel before storage. In combination, these methods yield a layered approach: soak, scrub, rinse, dry, then optionally polish with sunlight or alcohol for an extra assurance of cleanliness.
The practical guidance of these steps translates into a reliable routine you can perform without specialized tools. The key is to approach each piece of the lid with the same care you give the cup body itself. The inner plug, the silicone gasket, and the outer cap are all components that interact with beverage contents and with your mouth. Treating them as a single system—part cup, part seal, one unit for storage—encourages better hygiene and helps you notice early signs of wear that would otherwise go unaddressed. This holistic perspective also makes it easier to decide when a component needs replacement. If mold has deeply penetrated porous areas of the gasket, or if the seal shows persistent cracks, tears, or deformations, replacement becomes a prudent option rather than repeated cleaning attempts. In such cases, moving toward a more durable option, such as a different material or a higher-quality lid, can be a safer, longer-lasting solution. A mindful choice here preserves health while simplifying future maintenance.
If you want to explore options for safer, more durable drinkware, you can browse the Plastic Cups category to see how materials vary and what alternatives might suit your routine. The distinction between different plastics, and the way they respond to heat, moisture, and cleaners, can influence how you approach maintenance. For a broader view of related products and accessories that enhance the cleaning process—like lids and seals designed to resist mold—you can explore the wider drinkware collection linked here: Plastic Cups.
In summary, the vinegar soak method for the lid gasket and related components offers a practical, reliable pathway to reclaim moldy plastic cups. It emphasizes disassembly, gentle but effective chemical action, thorough scrubbing, complete rinsing, and patient drying. By addressing mold where it hides—in the gasket’s folds and along the cap’s inner channels—you avoid a cycle of cleaning that leaves the problem dormant rather than solved. By pairing this approach with occasional baking soda scrubs, optional sunlight exposure, and a quick alcohol wipe, you establish a robust routine that emphasizes safety and longevity as much as cleanliness. And because mold is opportunistic, not inevitable, the simplest preventive step is to ensure every piece is fully dry before sealing it away. If that routine becomes a habit, mold will no longer be the silent guest in your kitchen but a problem that is quickly spotted, addressed, and resolved, returning your plastic cups to a state of simple, dependable cleanliness.
External reading: for a broader, step-by-step guide on removing mold from plastic containers and their seals using household vinegar, see https://www.cleanitwithvinegar.com/cleaning-mold-off-plastic-cups/.
The Gentle Scrub that Clears Mold: Baking Soda as the Safe, Effective Cleaning Core for Plastic Cups
Mold that forms on plastic cups often hides in the small crevices around rims, lids, and the bottoms where moisture can linger. It can be stubborn, yet it seldom requires harsh chemicals to restore a cup to a safe, usable condition. Baking soda stands out in this task because it offers a patient, reliable approach that aligns with the broader goal of keeping plastic cups clean without compromising material safety. The beauty of this method lies in its simplicity and accessibility: a paste, a gentle scrub, a thorough rinse, and a drying phase that, when done correctly, makes mold less likely to return. Baking soda does more than remove visible grime. It acts as a natural deodorizer, neutralizing odors that mold tends to leave behind. It also functions as a mild abrasive, which means it can lift surface spores from the plastic without scratching the surface. In households where odors linger after a mold episode, this dual action—cleaning plus odor control—can make the difference between a cup that feels fresh and one that still carries a faint, musty trace of the problem.
To begin, gather a few simple supplies that most households already have on hand. You will need baking soda, plain water, a soft brush or sponge, and a container for soaking if you choose that route. A soft-bristle brush is ideal for reaching the grooves and rims where mold tends to hide. If you’re cleaning several cups, you might find it convenient to prepare a small soaking container so you can work hands-off for a while, enabling the baking soda solution to do much of the initial lifting. The method discussed here keeps the process practical and repeatable, which is important for ongoing maintenance after the first mold episode.
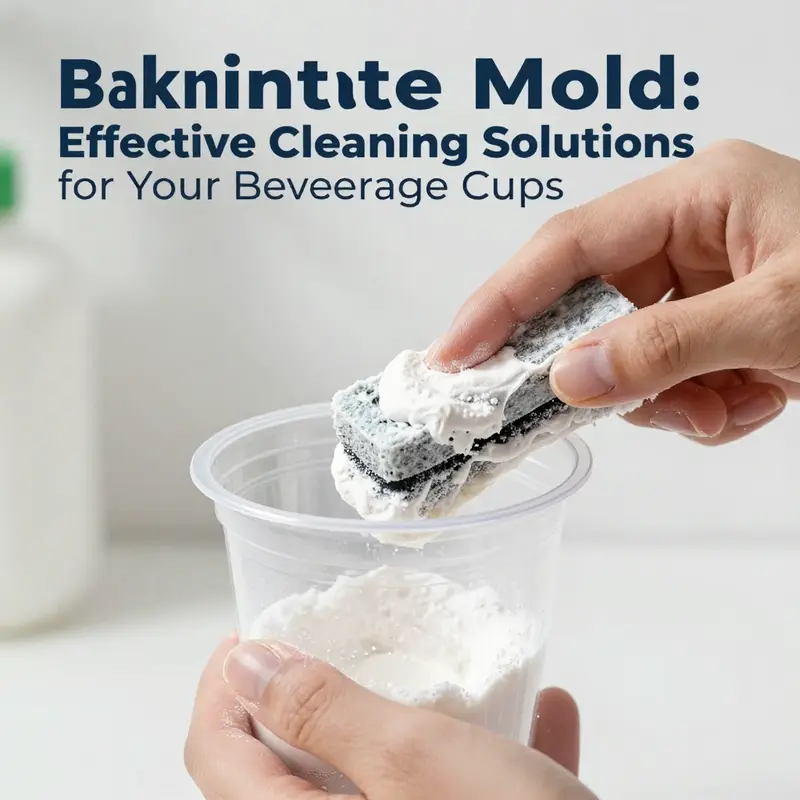
The core of the technique is a paste that is easy to apply and effective in lifting mold from plastic. Mix baking soda with water in a ratio of three parts baking soda to one part water. The result is a thick paste that clings to surfaces without running off the cups. The exact consistency can be adjusted slightly; aim for something that stays on vertical surfaces without dripping, yet remains spreadable enough to cover the moldy patches. This paste is not merely a cosmetic fix. Its alkaline nature helps disrupt the mold’s microenvironment and enhances the mechanical action of scrubbing. The combination of chemical and physical action makes it harder for spores to reattach once you remove them.
Apply the paste directly to the moldy areas. Focus on the interior rim, inner walls near the base, and any crevices around the lid if your cup has one. Mold tends to thrive where moisture hides, so paying attention to these zones matters. Let the paste sit briefly—just long enough for the baking soda to begin to soften and lift the film. Then use a soft brush or sponge to scrub gently but firmly. The goal is to dislodge any surface spores and stains without scuffing the plastic. Work in small circles, particularly around seams and ridges, where spores like to cling. The mild abrasiveness of baking soda aids in this mechanical action and helps prevent the paste from simply smearing mold around rather than removing it.
After scrubbing, rinse the cup thoroughly with clean water. A careful rinse is essential to remove all baking soda residue, which, if left behind, can leave a powdery film on the surface. While the paste is non-toxic, you still want to avoid leaving any residue that could affect taste or texture in future uses. If you are cleaning a set or several cups, you can rinse under running water and then wipe with a clean cloth to ensure there are no stray particles clinging to grooves. Once rinsed, allow the cup to air dry completely. The drying phase is not a mere courtesy; moisture is the primary driver of mold regrowth. If quiet sunshine is available, placing the cup in direct sunlight for several hours can provide an additional, natural disinfection boost. UV light is a gentle, supplemental ally in reducing surface microbes, and it helps ensure the cup dries thoroughly rather than sitting damp in a cabinet.
For persistent mold, a longer, soaking step can be very helpful. If initial scrubbing leaves faint traces of mold, fill a container with a baking soda and water solution in the same 3:1 ratio and submerge the cups for several hours. This soaking allows the alkaline bath to loosen any deeply embedded spores, giving the subsequent scrub a stronger lift. After soaking, remove the cups, scrub again with a fresh paste, and rinse as before. This extra step is practical because it extends the cleaning window without introducing harsh chemicals. It is a gentle solution for cups that have seen repeated use or where mold has found a way to hide beyond the reach of a quick scrub.
The safety profile of baking soda in household cleaning is one of its strongest attractions. It avoids the risks associated with harsher cleaners that can degrade plastic or leave chemical residues in contact with food or drinks. As you consider switching to or maintaining a baking-soda-first routine, keep in mind a few practical guardrails. Do not use bleach or other aggressive detergents on plastic cups unless you are certain the material can tolerate them. For many common plastic types, bleach can cause warping or micro-cracking over time and may introduce unwanted substances into beverages. If your cup is labeled as heat-sensitive or made from a plastic that reacts to strong chemicals, prioritize non-chlorine approaches like baking soda and gentle rinsing. In addition, be mindful of the drying surface you choose. A dish rack or a clean towel in a well-ventilated area is preferable to leaving cups stacked while still damp. Thorough drying, as noted, is the decisive factor in preventing mold’s return.
Experts in environmental health reinforce the idea that simple, non-toxic cleaners can be surprisingly effective for everyday maintenance. Dr. Lena Patel, an Environmental Health Scientist, emphasizes the value of common, non-toxic agents in household cleaning. In her view, \”Baking soda is nature’s scrubber and odor eater… for everyday maintenance, few products are as universally useful,\” highlighting its reliability in tasks like mold removal from household items such as plastic cups. This perspective aligns with a broader pattern of safe cleaning that reduces risk while still delivering results. It also makes the baking soda approach accessible to households with children or pets, where minimizing chemical exposure is a priority. The reassurance that a routine like this can be repeated safely over time helps many people stay committed to regular cleaning rather than letting mold become a recurring problem.
As with any cleaning plan, there is value in placing this method within a broader framework of best practices. The central message is that a clean, mold-free cup begins with thorough drying and careful handling. After you finish, inspect the cup for any signs of wear that could indicate deeper issues. If the surface shows deep staining, persistent odors, or if the mold has penetrated into porous materials or seams that resist cleaning, replacement becomes a reasonable option. Plastic cups are designed for reuse, but they are not immune to damage from repeated exposure to moisture and cleaning cycles. When mold has penetrated beyond the surface, or when the cup has scratches or cracks that trap moisture, discarding the item and moving to a safer alternative, such as a stainless steel cup, may be the more durable choice in the long run. This is not a defeat but a practical decision to ensure health and ease of cleaning in daily life.
While baking soda is a robust core technique, many readers find that combining methods yields the best results, especially for stubborn odors or hard-to-reach areas. A multistep approach—starting with a vinegar soak, followed by a baking soda scrub, and finishing with a sun-drying session—can maximize effectiveness without resorting to harsher chemicals. The vinegar soak helps break down some of the organic residues that feed mold, while the baking soda step provides mechanical lift and odor control, and the sun exposure helps reduce residual microbes and promotes complete drying. This integrated approach respects the principle of minimal chemical use while leveraging the strengths of each method. If you choose to blend methods, proceed gradually and observe how your cups respond; some combinations may work well for certain plastics and less well for others.
To connect this guidance to practical use, consider how you store and care for cups after cleaning. Keeping a cup in a dry, well-ventilated place reduces moisture buildup, which is the primary catalyst for mold regrowth. If you have a dish rack, position the cups with ample air circulation. A dedicated storage area away from direct heat and sunlight helps preserve the cup’s integrity over time. If you frequently reuse cups in environments with high humidity, you might benefit from rotating cleaning routines so that each cup has adequate time to dry completely before the next use. The goal is consistency: a quick, thorough cleaning after each use, followed by proper drying, pays off with better odor control and less frequent heavy cleaning.
For those curious about the broader ecosystem of cleanup options, a quick reference to related items can be helpful. If you’re restocking or exploring durable options, the Plastic Cups category offers a range of sturdy, dishwasher-safe choices that pair well with simple cleaning routines. The link below leads to a collection of plastic cups designed for repeated use, where practical shape, lip design, and wall thickness can influence both usability and cleaning ease. Plastic Cups.
In summary, baking soda provides a calm, effective, and safe centerpiece for mold removal on plastic cups. Its combination of mild abrasiveness, odor control, and chemical neutrality makes it well suited to routine maintenance and occasional deep cleaning. The steps are straightforward: prepare a three-to-one baking soda paste, apply and scrub the moldy areas, rinse thoroughly, and dry completely, preferably in sunlight when feasible. For persistent cases, extend the treatment with a longer soak in the same alkaline solution, then re-scrub and re-rinse. A cautious approach ensures the plastic remains intact, while the mold’s grip on the cup weakens over repeated cleanings. If odor or staining persists, consider a multi-method approach that blends vinegar, baking soda, and sun exposure, always maintaining safety as a guiding principle. And when mold proves resistant to all cleaning efforts or when wear and tear undermine the cup’s integrity, replacing it with a safer, easier-to-clean option is a sensible choice. The goal is simple: clean, odor-free cups that can be used with confidence, without introducing risks to health or household air quality.
External resource: https://www.healthline.com/health/benefits-of-baking-soda#cleaning
Sunlight, Alcohol, and Dryness: A Cohesive Path to Mold-Free Plastic Cups
Mold on plastic cups is a stubborn nuisance that tends to creep into crevices, seams, and lingering residues more often than people expect. Even when a cup looks clean, microscopic mold spores can cling to the inner surfaces and hitchhike in on damp hands or lingering drink residues. The problem is not unique to any one household or season; it is a reminder that plastics, while convenient, still require thoughtful care to prevent regrowth. This chapter weaves together two practical, widely recommended strategies—alcohol disinfection and sunlight exposure—into a single, cohesive routine. The goal is not to rely on a single trick but to create a layered approach that neutralizes mold, minimizes odors, and supports safe, long-term reuse of cups that remain in good condition. Keeping the narrative in one smooth arc helps readers see how each step builds on the last, so the process feels natural rather than procedural and tiresome. At its core, the method respects the material’s limits while leveraging nonchemical and accessible means to restore a cup’s cleanliness and safety. It also invites readers to consider the broader context of storage, drying, and prevention, because mold takes root where moisture lingers and humidity persists. The guidance here centers on a careful balance: effective disinfection with alcohol and the ecological, low-tech power of sunlight, paired with conscientious drying and storage that prevent a relapse into mold growth.
Begin with an honest assessment of the cup in hand. If the cup shows deep staining, a persistent odor, or signs of wear that compromise its integrity—warping, cracking, or significant clouding beyond simple surface marks—consider replacing it. Mold can penetrate microcracks and porous regions in ways that cleaning cannot fully eradicate. In such cases, a durable switch to a safer alternative, like a stainless steel or glass cup, avoids repeated cycles of cleaning that may degrade the plastic over time. When replacement is not immediately necessary, the described regimen offers a robust path to reclaiming a mold-affected cup and to preventing future recurrences. For readers curious about the wider range of cup options and related ware, a quick reference point is the plastic cups category, which provides a sense of scale and material variety while keeping the focus on practical sanitation. You can explore it here: plastic cups category.
The cleaning sequence is designed as a layered ritual rather than a one-off scrub. Start with the most straightforward step—the basic rinse and wash—then move to disinfection, then to environmental drying and sunlight exposure. This order matters because removing surface debris and organic matter first makes subsequent disinfection more effective. Warm water with a mild dish soap loosens gooey residues, coffee oils, or sugary films that mold spores cling to. A thorough wash also reduces the burden on the more aggressive disinfection steps, enabling them to do their job more efficiently. It helps to use a small brush or sponge to reach under rims, along the lid groove if the cup is a container with one, and into any little crevices where grime can accumulate. After the initial wash, give the cup a final rinse with clean, warm water to prepare it for the disinfecting phase. The act of washing is not merely cosmetic; it is foundational for the steps that follow and contributes to a more dependable outcome.
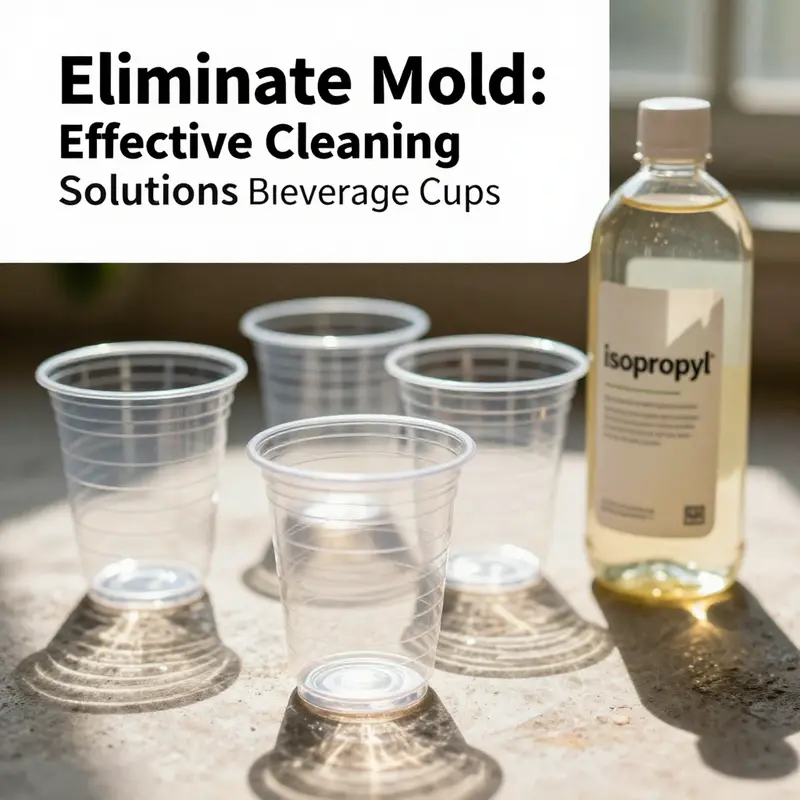
The core disinfection phase centers on alcohol. Use a 75 percent concentration of isopropyl alcohol, applied generously to both the interior and exterior of the cup. Alcohol is prized for its rapid action against mold spores and many bacteria, plus its tendency to evaporate without leaving a sticky residue. A practical approach is to wipe down all accessible surfaces with a cotton cloth or a clean cotton swab, paying special attention to seams, rims, and any small recesses where mold often hides. Let the alcohol sit for about five minutes. This dwell time matters; it gives the solution a window to penetrate microscopic coatings and disrupt the cellular structures of mold organisms. After this interval, allow the cup to air dry completely. Do not rinse away the alcohol immediately; the evaporation process is part of the disinfection, and the drying phase helps prevent moisture from persisting in hidden pockets where regrowth could begin. It’s important to note that while alcohol is effective, frequent or aggressive use over time can contribute to material fatigue in some plastics. Readers should balance thorough disinfection with the lifespan of their cups, rotating to safer options when signs of degradation appear.
With alcohol-assisted disinfection complete, the next step is sunlight. Place the cup in direct, unobstructed sunlight for a sustained period—ideally during peak solar hours, roughly from 10 AM to 4 PM. The UV rays act as a natural, supplementary disinfection mechanism, helping to damage any residual mold DNA and reduce the likelihood of regrowth. For best results, rotate the cup or turn it periodically so that all surfaces receive even exposure. The goal is a dry, sunlit finish where every surface is free from moisture. The sunlight step is not about turning the cup into a cooking tool; it is about leveraging a gentle, natural sterilization method that works well when combined with air drying. This final step also reinforces the principle of minimizing moisture, a key factor in preventing future mold rests.
After the sun exposure, perform a final check under strong light. Look for any faint stains or odors. If the cup appears clean, allow it to cool and dry completely before putting it away. Storage should be in a clean, dry, and well-ventilated space. Avoid stacking cups immediately after cleaning, and keep them open or positioned upside down so that air can circulate and residual moisture can escape. A careful storage habit reduces the chance that damp surfaces encounter new mold spores and begin a fresh cycle of growth.
The two-method approach—alcohol for immediate microbial kill and UV exposure for residual sterilization—has solid grounding in environmental health considerations. While the methods are straightforward, they draw on principles that have been discussed in professional guidelines and public health discussions. Alcohol provides rapid bactericidal and fungicidal action that is well documented for household disinfection tasks. UV exposure adds another layer by compromising the DNA of surviving organisms and discouraging further propagation. The combination is particularly well suited for plastic items that cannot be subjected to high heat, yet require dependable disinfection. It is worth noting, of course, that these methods are most effective when applied to items that are structurally sound and free of deep cracks and crevices that harbor mold beyond the reach of cleaning fluids.
Practical considerations help translate this method into everyday life. Thorough drying remains the linchpin of mold prevention. Moisture is the principal driver of regrowth, so air-drying in a warm, well-ventilated area is essential after cleaning. If possible, store cups in a way that promotes airflow, such as keeping two or three cups separated and upright rather than nesting them tightly together. This practice reduces the chances of moisture being trapped between surfaces, an often overlooked source of future mold concerns.
Another vital point concerns material safety. Bleach and other harsh chemical cleaners are not recommended for most plastic cups unless the material specification explicitly confirms compatibility. Bleach can cause plastics to become brittle, discolored, or warped, and it can also leave residual compounds that might migrate into beverages. Hot water or direct sunlight can also warp certain heat-sensitive plastics, especially PC (polycarbonate) types, which might degrade with repeated exposure. Readers should check for any manufacturer guidance on cleaning and avoid methods that could compromise the cup’s integrity. If the cup shows signs of wear that could compromise safety—such as cracking, splitting, or thinning around the rim—it is prudent to retire it and switch to a more durable option. The goal is not only to remove mold but to maintain a safe, reusable cup over time.
In cases of persistent mold or strong odors, it is reasonable to re-evaluate the approach. Some readers may choose to combine methods more aggressively, for example by a brief vinegar soak before the alcohol step or by extending a sunshine period if weather conditions permit. However, any adjustments should be made with a careful eye toward material compatibility and the cup’s physical condition. The cadence of cleaning, disinfection, and drying can be adapted to individual circumstances, but the underlying principle remains: remove debris, kill microbes, and dry thoroughly to discourage recurrence.
From a broader perspective, this chapter sits at the intersection of practical household hygiene and sound material stewardship. Its emphasis on non-bleach methods aligns with widely accepted cautions about chemical compatibility and consumer safety. The approach also reflects a respect for environmental conditions that can be harnessed to improve everyday sanitation without specialized equipment or expensive supplies. As readers consider their own habits, a simple yet effective routine emerges: wash, disinfect with alcohol, aid with sunlight, dry completely, and store thoughtfully. In doing so, they not only reclaim a mold-affected cup but also set up a durable pattern that supports safer, longer-term reuse.
For further context on the broader landscape of safe cleaning and disinfection practices, the Centers for Disease Control and Prevention provide guidance that supports the practical ideas outlined here about alcohol use and UV-based approaches in household settings. While not specific to plastic cups, these guidelines reinforce the reliability of disinfection steps that do not rely on harsh chemicals or heat that plastics may not tolerate. External readers may consult the CDC’s Environmental Cleaning and Disinfection guidelines to deepen their understanding of the science behind the methods discussed and to inform their own routines in other household contexts. External resource: https://www.cdc.gov/hai/pdfs/guidelines/EnvironmentalCleaningand_Disinfection.pdf.
Final thoughts
Keeping your plastic cups free from mold is essential for maintaining a clean and safe beverage service. By employing techniques like vinegar soaking, baking soda scrubbing, and utilizing sunlight and alcohol, you can efficiently address mold issues. These methods not only cleanse but also enhance your operational efficiency and uphold your establishment’s reputation. Staying proactive in cleaning will ensure that your customers enjoy their beverages without concern, highlighting your commitment to quality and health standards.