
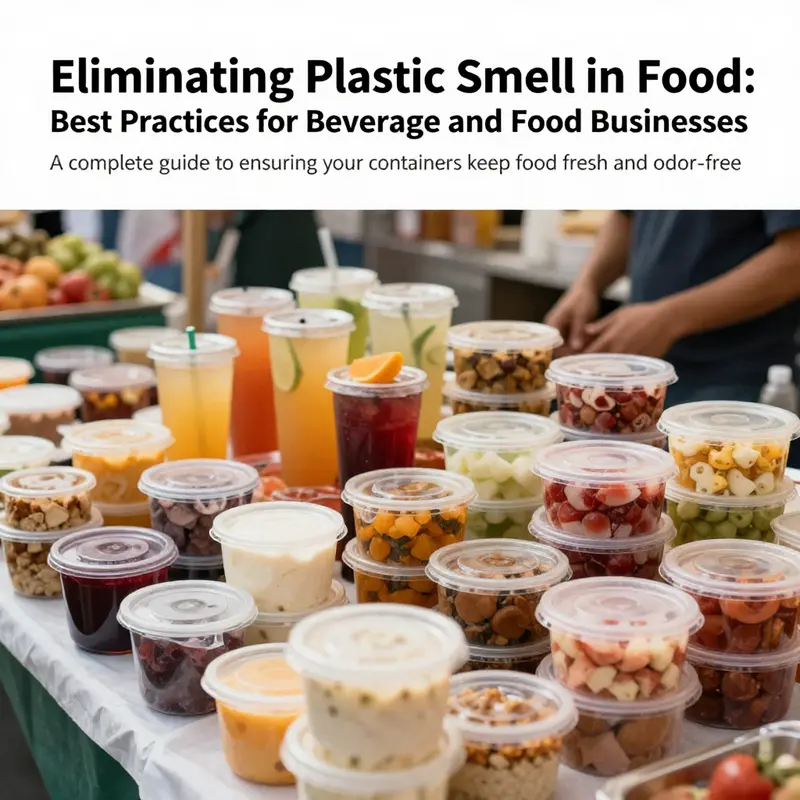
In the food and beverage industry, maintaining freshness and flavor is paramount, especially when it comes to your storage containers. One common challenge faced by bubble tea shops, restaurants, food trucks, and catering services is the unwelcome plastic smell that can seep into food and drinks. Understanding how to select the right materials, handle heat effectively, employ proper cleaning techniques, ensure thorough drying, and store containers correctly can make a significant difference. This guide will delve into these essential practices, equipping you with the knowledge needed to ensure your containers never compromise the quality of your offerings.
Material Matters: Choosing Containers That Keep Food Smell-Free and Safe
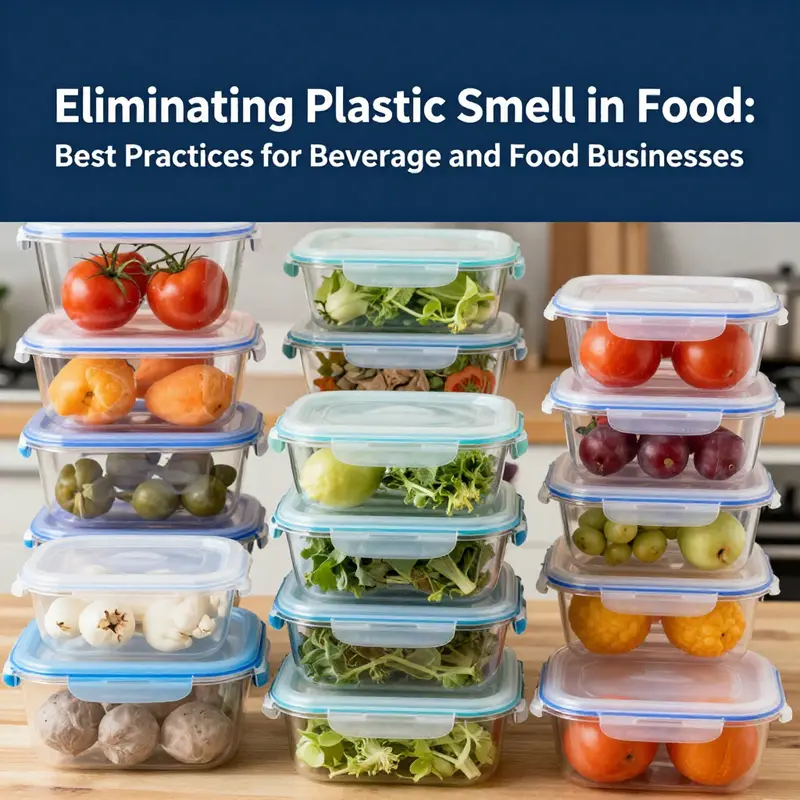
Choosing the right material for food storage is the single most effective step toward preventing plastic smell from transferring to your meals. Not all containers are created equal. Some are chemically inert and stable under heat and contact with oils, while others release volatile compounds that carry an unpleasant plastic odor and can migrate into food. This chapter explains how materials behave, which ones to prefer, and practical rules for using plastics safely when you must.
Start with the simple rule: favor inert, non-plastic materials whenever feasible. Glass, ceramic and stainless steel are chemically stable and do not off-gas volatile organic compounds when they contact food or heat. Glass—especially borosilicate or tempered varieties—resists thermal shock, remains odor-free, and cleans easily without retaining grease. Ceramic glazes used for food storage are similarly non-reactive. Stainless steel provides durability, a high heat tolerance, and no tendency to absorb flavors. When the priority is preserving the true aroma of food and eliminating any risk of a plastic smell, these three materials offer the best baseline.
There are practical reasons, however, why plastic containers remain popular: they are light, inexpensive and unbreakable. When you choose plastic, do so intelligently. Only use plastics explicitly labeled for food contact. Look for markings or certifications indicating FDA approval or EU food contact compliance; these labels signal that the material was evaluated for safety with foods. Beyond labels, trust your senses: a strong plastic smell in a new container is a red flag. It usually signals the presence of volatile compounds—aldehydes, ketones or esters—that can migrate into food, especially under heat or with oily foods.
Not all plastics behave the same. Some polymer types are higher risk and should be avoided for food storage, particularly when heating or storing fatty and acidic items. Polyvinyl chloride (PVC) is one to steer clear of: it has additives that can migrate when heated and has limited suitability for repeated food contact. Polystyrene (PS), commonly used in disposable containers, can leach styrene particularly when exposed to heat or acidic ingredients; it is a poor choice for reheated meals or long-term storage.
If you must use plastic, prefer types known for thermal stability and low migration. Polypropylene (PP, recycling symbol #5) performs well in microwaves and dishwashers and shows relatively low odor and chemical migration. High-density polyethylene (HDPE, #2) is durable and resistant to moisture and many chemicals. Low-density polyethylene (LDPE, #4) is often used for flexible wraps and can be acceptable for cold foods. These plastics have higher melting points and better resistance to oils and heat than many alternatives. Still, they are not immune: heat and fat accelerate the release of any residual monomers or additives that might carry odor.
Always consider usage conditions. Heat and fat are the twin accelerants that increase the chance of plastic smell. Hot soups, stews and recently cooked foods should never be placed into plastic containers and left to cool for long periods. Transfer hot leftovers to glass or stainless steel as soon as it is safe to handle. Also avoid storing particularly oily or fatty foods—fried items, heavy dressings, or oily curries—in plastic for extended periods. Oils can seep into microscopic pores or scratches in the plastic and trap odors that later release into otherwise neutral foods.
Container condition matters more than most people realize. Scratches, cloudiness and warping create extra surface area and micro-cracks where oils and odor-causing molecules lodge. Over time these imperfections make a container more likely to impart smells to your food. Inspect plastic containers regularly. If you notice visible wear, crackling, or a persistent smell even after cleaning, it’s time to retire the item. Follow manufacturer guidance on temperature limits; exceed them at your own risk.
When selecting containers for long-term storage or for transporting food, think about lids and seals. A tight-fitting lid prevents cross-contamination of odors in your fridge. However, some lids are made from different polymers than the container body, and they may be more prone to off-gassing. Favor full sets labeled as food-grade, or use glass containers with silicone seals—food-grade silicone is stable and less likely to trap or impart smell. For disposable needs, consider switching to compostable options made from paper or bagasse with appropriate coatings; they reduce the chance of plastic smell entirely for single-use scenarios. For an example of recyclable kraft-paper options suitable for takeaway and storage, see this recyclable kraft paper disposable bowl.
Practical shopping tips help you make good choices quickly. Check for recycling codes and food contact symbols. Read labels for temperature and dishwasher suitability. Smell-test new containers before first use; a faint neutral plastic scent may be normal, but strong plasticiness is a warning. Prefer transparent labeling that includes material type and intended use (microwave-safe, freezer-safe, etc.). If the container manufacturer provides guidance about the maximum safe temperature or whether the product is microwave safe, follow it strictly.
Even with the right material, correct handling extends lifespan and prevents odors. Avoid using abrasive scouring pads on plastic; they create surface damage that captures oils. Heat speeds up migration of chemicals, so avoid microwaving food in containers not explicitly rated for that use. When microwaving in safe plastics, remove the lid or vent it to avoid steam buildup and trapped odors. For reheating, glass or ceramic is still preferable.
Storage strategy also makes a difference. Store empty containers and lids separately to allow air circulation and prevent trapped moisture. Place a small sachet of activated charcoal or a few dried tea leaves inside containers during long-term storage to absorb any latent odors. Keep storage areas cool and dry; heat and humidity can amplify off-gassing.
When plastic smell does appear, immediate cleaning helps but prevention is better. If you do detect odors, discard severely affected plastics. For mild cases, soak in a solution of white vinegar and water (one part vinegar to three parts water) for a couple of hours, then rinse and air dry. Baking soda paste or a baking soda soak can absorb lingering odors as well. Repeated treatments may help, but they cannot reverse deep absorption by oils and micro-cracks.
Finally, match the container to the task. Use glass or stainless steel for hot foods, oily sauces, and long-term storage. Reserve food-grade plastics for short-term cold storage, dry foods, or when durability and lightweight containers are essential. Accept that some situations call for single-use options: in those cases, choose responsibly sourced, coated paper or bagasse products to avoid any plastic smell entering food.
Choosing the right container material is both a safety and sensory decision. It preserves food flavor and aroma and reduces exposure to migrating compounds. By favoring inert materials, selecting high-quality food-grade plastics only when necessary, avoiding heat and oily interactions, and maintaining containers properly, you can keep your meals tasting as they should—clean, fresh, and free of plastic smell.
For more detailed guidance on identifying safe plastic types and material properties, consult this comprehensive resource: https://www.vipzai.com
Heat, Fat, and Odor: Keeping Plastic Smells Out of Food Through Safe Temperatures and Grease-Smart Storage
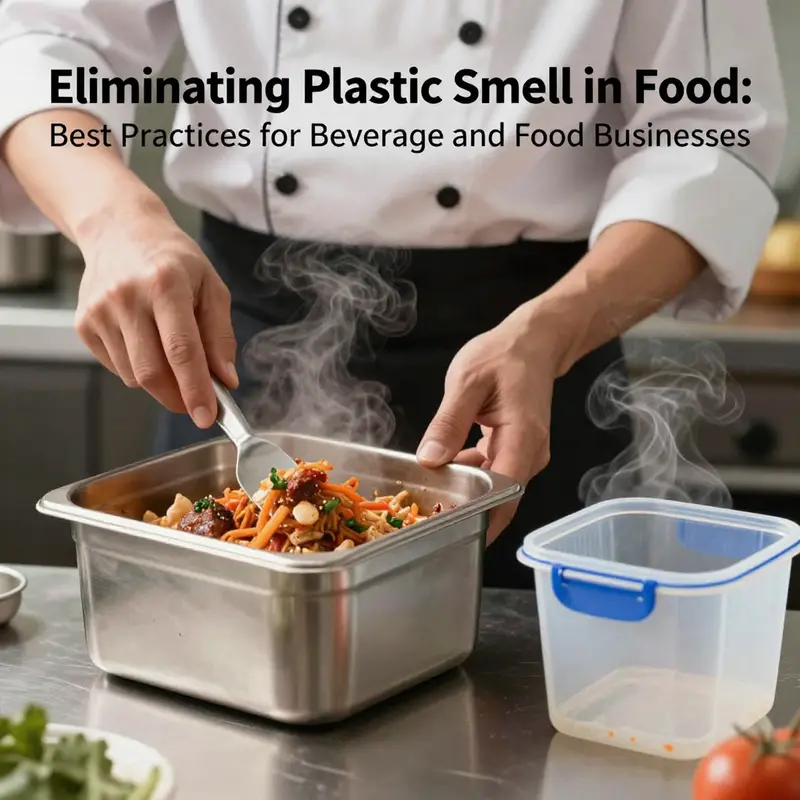
Odor in food from plastic containers is more than a nuisance; it is a clue about how materials interact with real meals. When you pour a hot soup, a freshly microwaved sauce, or a sizzle-filled stir-fry into a plastic vessel, you are not just warming the food. you are inviting molecules from the container to mingle with what you eat. The science behind this is clear enough to shape everyday choices: heat accelerates chemical migration, and fats and acids in foods act as solvents that can draw more of those chemicals into the meal. The result can be a noticeable plastic smell, and in some cases a subtle shift in taste. This is not a blanket warning about all plastics in all situations, but a call to understand the conditions under which plastic odors develop and to adjust your storage and heating habits accordingly.
At the core of this issue are additives used in various plastics. Phthalates and, in some materials, bisphenol A (BPA) have historically drawn attention for their potential to migrate into foods. Even though modern manufacturing often reduces BPA exposure, migration can still occur, especially when plastics are subject to heat or when they contact fatty or acidic foods. When you heat a plastic container, the kinetic energy of the molecules increases, allowing volatile compounds from the plastic to become airborne and some to dissolve into the food itself. That is why hot items or liquids stored in certain plastics often acquire that characteristic synthetic odor more quickly than cold items. The same principle applies to high-fat foods. Oils act as powerful carriers; their solvent-like properties help liberate additives from micro-pores in the plastic’s surface. Over time, repeated use of the same container with fatty sauces or fried bits can amplify the odor, even if the container is marketed as food-grade.
A practical way to think about it is to balance the temperature of contact and the composition of what you store. Food storage containers vary widely in their thermal stability and in how readily they release or absorb scents. The best defense is to choose materials designed for food contact and to avoid exposing them to conditions that encourage migration. This is where the designation of food-safe materials matters most. Polypropylene specifically labeled as PP5 and materials known for strong chemical resistance, such as Tritan, stand out for their relative resistance to odor pickup and chemical migration under typical kitchen conditions. These materials are engineered to be safer for repeated contact with food, especially when you anticipate reheating or storing leftovers. Yet even with safer plastics, the rule remains: heat and fat increase risk, so tailor your habits accordingly.
The chapter’s guiding principle, therefore, is simple in practice: minimize heat exposure when using plastic containers and avoid fatty or highly acidic foods in plastic for extended periods. The science supports it in multiple ways. Heating plastic can release odors and potentially harmful compounds. When oils, sauces, or acidic marinades are present, their chemical activity amplifies the potential for migration. This is not a moral judgment about plastic use but a call to apply heat and storage practices that reduce the likelihood of odor transfer and chemical exposure. If a meal is hot, think about transferring it to a safer vessel before reheating or serving. If a sauce is rich in oil or an acidic component, consider alternatives to plastic for storage, especially for longer-term needs.
So how does one translate this knowledge into everyday kitchen behavior without disrupting convenience? Start with material choices. When possible, opt for containers made from food-grade PP (#5) or Tritan. These materials are designed to resist the kind of leaching that bears odors and to maintain clarity and safety under typical household use. They also tend to hold up better in microwave reheating scenarios than lower-grade plastics. The trade-off is not perfection; it is practicality paired with informed usage. If a container’s origin or labeling is unclear or if its performance feels questionable, treat it as a potential risk and choose a safer alternative.
Next, align heating and storage habits with the nature of the food. Never use plastic containers for hot foods or liquids that have just come off the stove or microwave. The moment you introduce high heat to certain plastics, you increase the likelihood of odor transfer and of chemical migration. When dealing with high-fat items like gravies, fried dishes, or oils-rich sauces, the risk rises further. The fats act as solvents for additives, pulling substances into the food and, more perceptibly, intensifying the odor. The practical implication is straightforward: if you anticipate reheating or storing hot or oily foods, prioritize safer materials or switch to glass or stainless steel for that purpose. These materials maintain their integrity under heat and do not share the same risk of odor transfer.
Cleaning and drying form the other half of the odor-control equation. After each use, wash containers promptly with warm water and mild dish soap. The sooner you remove food residues, the less time residues have to interact with the container’s surface. For stubborn odors, a two-step approach can be surprisingly effective. Soak the container in a solution of one part white vinegar to three parts water for about two hours. The acidity of the solution helps neutralize lingering odors without harsh scrubbing. Alternatively, a baking soda and warm water soak can act as a gentle deodorizer and absorber. After any soak, rinse thoroughly to remove residual acidity or alkaline residues. It is not enough to remove the visible gunk; you want to diminish the invisible odor compounds so that storage does not reintroduce the smell when you open the container later.
Crucially, ensure complete drying before storage. Moisture inside containers becomes a breeding ground for bacteria and mold, which produce their own odors that can mingle with any plastic smell left behind. The best practice is to air-dry containers in a well-ventilated area, ideally with the lid off or left ajar so air can circulate. A final wipe with a clean towel can help remove traps of moisture in seams. Only once completely dry should you store containers in a cool, clean, and dry place. If you have infrequently used containers, a light airing of the lid and interior before returning them to storage can help prevent stale odors from lingering across long periods of idle use.
Storage strategy itself matters. An empty container is easier to keep odor-free than a full one, precisely because there is less organic matter to trap odors. Consider keeping containers in a cooler, drier corner of the kitchen and avoid damp cupboards that promote mold. Some households find it helpful to place a small odor absorber inside long-term storage containers. Activated charcoal or simple dried tea leaves can act as a mild scent trap, absorbing residual odors and keeping the interior smelling fresher over weeks or months of storage. The concept is not to mask smells but to reduce the environment where odors could cling to the plastic surface or to any microscopic roughness in the container’s pores.
If odor concerns persist despite best practices, a more radical but increasingly practical option is to transition away from plastic for certain use scenarios. When heat, oil, or acidity is a regular part of a dish, glass or stainless steel containers provide clearer advantages. They do not undergo the same deformation under heat, they do not leach additives in the same way, and they are easier to clean thoroughly without harboring odors. The shift toward glass or stainless steel is a safety-minded decision that aligns with the goal of odor-free meals and reduced exposure to plastic-associated substances. It also reduces the cognitive load of deciding whether a container is safe on any given day, because glass and steel containers come with straightforward care routines and fewer exceptions to the rule of safe usage. While plastic remains convenient for many everyday tasks, recognizing its limits for hot, oily, or acidic meals allows you to plan ahead and choose containers that minimize risk rather than merely compensate for it.
Practical decisions around containers can still honor convenience. If you do continue to use plastic for certain meals, keep the heat low, transfer hot foods to safer vessels before storage, and avoid letting fatty or acidic items linger in plastic for longer than necessary. This approach respects the realities of busy lives while applying science-based precautions. For those who want to maintain a similar level of practicality while reducing odor risk, several paper-based or coated options provide a middle ground. For example, kraft-paper-based bowls offer a lighter, disposable alternative with different odor profiles than plastic. They can be suitable for certain meals and storage circumstances, especially when you anticipate short-term use and minimal heating. For readers who want a concrete example of such a non-plastic option, consider exploring kraft-paper octagonal bowls designed for take-away and short-term storage, which are documented in product listings such as the following: kraft paper octagonal bowls. This link provides a tangible sense of how a non-plastic option might fit into everyday routines, while still acknowledging that no material is utterly risk-free in every situation.
In the end, managing plastic odor in food containers comes down to understanding the cause-and-effect relationship among heat, fat, and chemical migration. It is not necessary to abandon plastics entirely, but a thoughtful approach to materials, heating practices, and cleaning routines can dramatically reduce odor issues and potential exposure. By choosing safer materials when possible, avoiding hot and oily conditions in plastic, and implementing effective cleaning and drying practices, you can enjoy meals without the distraction or concern of off-putting smells. And when circumstances call for it, gracefully switching to safer storage options like glass or stainless steel can offer a long-term solution that aligns with both health and taste. The result is a kitchen where food fragrance remains true to its natural character, and plastic smell is a rare guest rather than a constant companion.
External resource: For authoritative guidance on safe food storage practices, refer to the FDA’s official recommendations on plastic food contact materials: https://www.fda.gov/food/food-contact-materials
Odor Eraser in the Kitchen: Thorough Cleaning to Eliminate Plastic Smell from Food Containers
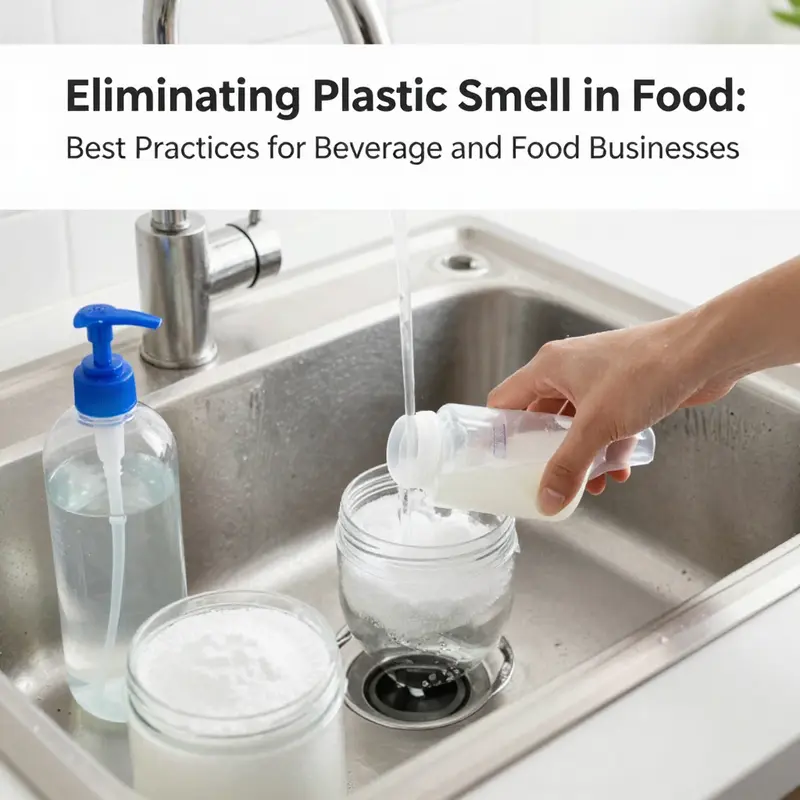
The scent of plastic in a favorite food container can feel stubborn, almost stubborn as a memory you want to forget. Yet science offers a clear path to minimize or even erase those odors. Odor, in this case, is not just a matter of taste; it is a molecular dance. Odor compounds reside on surfaces, travel through tiny pores, and sometimes cling to residues of oil and sauce. When food is stored, especially in damp or warm conditions, these molecules can migrate into the container itself, not just settle on the surface. The result is a whisper of plastic that flavors meals weeks after a first wash. With a disciplined cleaning routine, you can disrupt that process by removing both surface residues and embedded molecules, restoring the container’s neutral character. A careful blend of mechanical cleansing, chemical-neutralizing steps, and smart material choices creates a robust defense against unwanted aromas. The following approach weaves these elements into a practical, science-grounded routine you can adopt without fuss, while still respecting the realities of busy kitchens and varied storage needs.
A logical starting point is to recognize that the odor can be stubborn because it often originates from residual fats and oils that have penetrated micro-pores in the plastic. Those residues trap volatile compounds, especially flavors associated with garlic, curry, fish, or fried foods. Cleaning then must do more than remove surface grime; it must target embedded residues and the volatile molecules that hitchhike with them. The science behind this is straightforward: certain agents alter the chemical environment around odor molecules, while others physically absorb or volatilize the compounds so they depart from the container rather than linger within. The following sequence combines time-tested kitchen wisdom with practical experiments you can perform at home, using common ingredients that are safer and more economical than store-bought odor removers. The aim is to empower you to reuse containers with confidence, not to replace them prematurely, and to protect food quality without adding chemical smells in the process.
The baking soda soak is a classic for a reason. Baking soda is an amphoteric substance capable of neutralizing both acids and bases in the environment. In the context of odors, the alkaline environment helps neutralize many acidic odor molecules and the fatty residues that carry them. To try it, dissolve two tablespoons of baking soda in a liter of warm water and submerge the container completely. Let it sit for at least four hours; if the smell persists, extend the soak to twelve hours. During this period, the water’s warmth and the chemical characteristics of baking soda work together to loosen embedded residues and shift the balance of odor molecules away from their clingy locations. After soaking, rinse thoroughly with clean water to remove any loosened debris and baking soda residues. This step often yields a noticeable reduction in odors, sometimes a dramatic shift, particularly when curry spices or fried-food fragrances were the culprits. If needed, a second quick wash with mild soap and warm water can help clear any loosened oils that have become suspended in the rinse water.
White vinegar is another stalwart ally. Vinegar is a dilute solution of acetic acid, and its acidity can alter the chemical profile of odor compounds, promoting their breakdown or detachment from plastic surfaces. Dilute white vinegar with water in a ratio of one part vinegar to three parts water, then soak the container for twelve hours or longer. The acetic acid helps break down oils and a range of volatile compounds, including those that contribute to plastic or food smells. This method is especially effective after microwave use, when heat may have mobilized odors into the container’s structure. After the soak, rinse thoroughly and, if possible, allow the container to air dry completely before storing. The-vinegar-acetate approach is gentler on the material than harsher solvents, and the long soak maximizes contact between the acids and residual molecules. It is natural to worry about lingering acidity; a final rinse and a complete dry typically restore neutral smell without leaving a vinegar tang behind.
Sunlight exposure offers a different mechanism, leveraging the energy of ultraviolet light and heat to coax odor molecules out of the plastic. Place the cleaned container upside down in direct sunlight for six to eight hours. UV radiation accelerates the release of trapped odor molecules, a boon for newer containers that may still carry industrial solvent residues. This method works best with polypropylene containers, which tolerate heat a bit better than some other plastics. Avoid prolonged exposure for more heat-sensitive materials, and rotate or reposition the container if you have only a small sunny window so that different areas of the surface receive light. The upside-down orientation helps ensure that any residual moisture drains away rather than pooling, reducing the chance of mold or bacterial growth while odors escape. If your climate is less sunny, a sunlit windowsill can still assist the process, albeit more slowly.
Lemon juice brings a culinary-friendly clean that doubles as a scent reset. Mix juice from half a lemon into five hundred milliliters of warm water and use this solution to wipe the container, or to soak it briefly. The citric acid helps dissolve oily films that may trap odor compounds, and the natural citrus oils—especially d-limonene—can react with and neutralize certain odor-causing molecules. For a more robust citrus effect, boil lemon slices in water and pour the hot liquid into the container, then let it sit for twenty to thirty minutes before rinsing. This method leaves behind a refreshing scent while addressing the chemical roots of odors. It is gentle enough for most plastics, but always test on a small area if you’re unsure about a particularly soft or aged surface.
Tea-based adsorption rounds out the toolkit with a simple, natural absorber. Use leftover tea leaves—green or black—and place them inside the container. Seal it and let it sit for eight to twelve hours. The polyphenols in tea are known to bind some odor compounds and to support a mild antimicrobial effect, which helps with stale or fermented smells that can cling to rice, noodles, or other grain-based foods. After the sitting period, discard the leaves, rinse once more, and dry thoroughly. This method is especially practical when the container has a history of holding starchy or weekend meals; the gentle astringency of tea can help reset the aroma profile without aggressive chemicals.
Across these techniques, there are guiding practices that ensure success. Start with a basic wash using warm water and mild dish soap to remove obvious residues. Avoid abrasive tools like steel wool; scratching the surface creates micro-havens for odors. Drying is crucial. After any cleaning step, ensure the container is completely dry before storing. Moisture inside can foster mold and bacterial growth, which itself produces odors of a different sort. If the container is not thoroughly dry, air-drying in a well-ventilated space with the lid left off or the container inverted becomes a valuable habit.
As you consider reusing containers, the choice of material matters. Food-grade polypropylene (PP) and Tritan tend to resist odor uptake more than lower-quality plastics, particularly when they are not routinely exposed to high heat or oily foods. In practice, this means pairing a thoughtful cleaning regimen with containers made of these safer materials can markedly reduce the chance of a future odor problem. If you face repeated odor issues, it may be time to re-evaluate the container’s age and surface condition. Worn or deeply etched surfaces can harbor odor compounds in micro-scratches, making them harder to remove with routine cleaning.
For readers who want to explore safer storage options beyond plastic, there is a path worth considering. A growing range of eco-friendly disposable containers, designed with better-suited materials and finishes, can offer a lower odor-risk profile while remaining convenient for everyday use. For readers exploring storage options, consider eco-friendly disposable kraft containers. This approach blends practical functionality with a more conservative material footprint, which can help minimize odor retention while still meeting daily meal and takeout needs. You can explore such options here: https://cupbowlpack.com/product/senang05-eco-friendly-disposable-kraft-food-packaging-bowl-window-customizable-size-color-embossing-option/
Even the best cleaning and the best materials have limits. If, after trying these methods, you still notice a persistent odor, it may be time to replace the container—especially if it is old, warped, or heavily scratched. Odor compounds can become trapped in micro-defects where cleaning cannot reach them effectively. In such cases, a fresh start with a new container is prudent, particularly for containers that repeatedly store oily or acid-rich foods.
Beyond practical steps, a broader understanding helps. Choose containers designed for prolonged food contact with minimal risk of odor transfer. When possible, and especially for hot foods or liquids, favor materials that resist heat and chemical interaction. The idea is simple: prevent odor sources at the source, then complement prevention with a disciplined cleaning regimen that removes what remains. By combining careful material selection with deliberate cleaning, you can enjoy the convenience of plastic containers without surrendering to unwanted aromas.
External resource: for a broader perspective on safe food-contact materials and regulatory guidance, see the U.S. Food and Drug Administration’s information on food-contact substances. https://www.fda.gov/food/food-contact-substances-fcs
Drying as Defense: Thoroughly Dried Containers Guard Your Food Against Plastic Odors
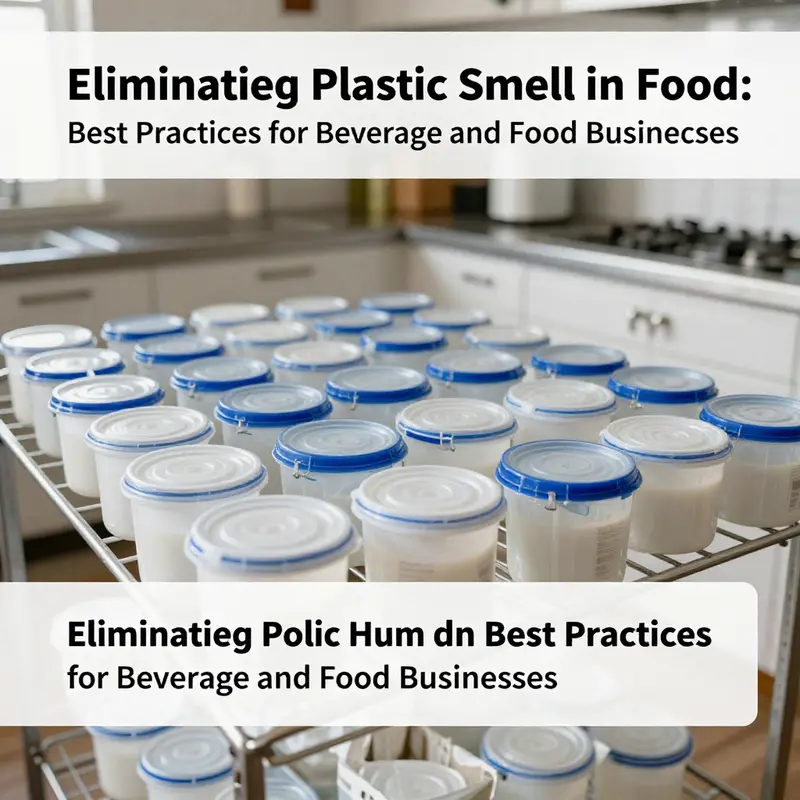
Moisture inside a food container is not merely water; it acts as a catalyst that can nudge a faint plastic scent from a container into the aroma of a stored dish. When plastic is warmed, stressed by heat, or repeatedly opened and closed, the damp environment can accelerate the diffusion of volatile compounds from the plastic itself and invite the growth of odor-producing microbes. A subtle plastic note in a reheated portion of rice or a tomato sauce may seem minor at first, but in busy kitchens those micro-odors accumulate. They can become more noticeable as time passes, especially when the container is used again for warm foods. The science behind this is practical and straightforward: tiny amounts of additives and residual monomers in plastic can migrate into food more readily when moisture is present, and heat further accelerates this migration. The result is not merely an inconvenience; it is a reintroduction of odors that can mask the natural flavors of food and, over time, may amplify through repeated heating. This makes complete drying not a cosmetic habit but a foundational step in safer, more neutral storage. The question then becomes not whether to dry, but how to dry in a way that minimizes odor transfer while preserving the container’s integrity for future use. In practice, the most reliable approach blends simple washing with controlled drying, a routine that reduces residual moisture, discourages mold, and minimizes the conditions that foster odor compounds to cling to plastic surfaces. After washing, a thorough rinse removes soap residues that can trap odors, and the rinse itself helps dislodge tiny particles that soap might otherwise carry into the container’s pores. This step, though often overlooked, lays the groundwork for the next moves. Once rinsed, the container should be ready for air drying, not towel drying, because a dry towel can deposit fibers and lint that harbor microbes and odors. Air drying is a quiet, steady process that lets the container shed water through evaporation rather than rubbing it into microscopic crevices. In a well-ventilated area, place the container upside down on a clean drying rack. This orientation encourages any trapped moisture to escape rather than linger inside the lid or along the rims. The idea is to convert residual moisture into vapor that leaves the container rather than moisture that clings to the interior walls. The avoidance of towels is deliberate; lint and fibers can become little nests for microbes, creating new odor bases that complicate future storage. If you live in a humid environment or need to speed up drying, gentle sunlight can be an ally, but it must be used with care. Exposing PP or PE containers to direct sun for four to six hours can accelerate drying by helping break down organic residues and reducing lingering odors. UV exposure can also contribute to disinfection on the surface, which is a helpful side effect. Yet there is a caveat: not all plastics tolerate sunlight equally. Polycarbonate, a different class of plastic, may degrade or discolor with prolonged sun exposure, so the sunlight step should be limited to containers known to be stable under this treatment. In other words, if you are not sure of the material, err on the side of longer air drying in a shaded, well-ventilated space rather than sun exposure. Once the container has dried completely, it should return to storage in a dry, cool, and dark place. The goal is not to seal it in a damp corner but to prevent reabsorption of ambient odors and to minimize the chance that any residual moisture will invite microbial growth. For long-term storage, some households turn to a simple odor-control trick: placing a small sachet of activated charcoal or a few dried tea leaves inside the container during periods of non-use. This is a passive, low-risk method to absorb stray odors that could otherwise creep back into the plastic. It is a gentle reminder that odor control is not a one-time act but a routine that shields the food ecosystem from unwanted notes. To bring this back to everyday practice, think of drying as a defense, not a chore. The routine matters because residual moisture inside containers does more than create damp environments; it can serve as a conduit for odor transfer when those containers are later loaded with food and subjected to heat. This is why the drying phase is not merely about comfort or cleanliness; it is about limiting the chemical interactions that can give rise to off odors during subsequent use. In this sense, drying links directly to broader safety and storage principles. Guidelines from food safety authorities consistently emphasize choosing materials that are designed for food contact, minimizing heating in plastic containers whenever possible, and maintaining clean, dry storage conditions to keep odors at bay. The practical takeaway is to integrate drying into a broader caution about heat and moisture. When you plan to reuse a container for hot foods or for foods stored for extended periods, begin with a thorough dry, then consider the material’s heat tolerance. An important element of this habit is selecting containers that are inherently more odor-resistant. While the discussion here centers on complete drying, it sits within a larger conversation about safe storage materials. For many people, the pathway to odor-free food starts with choosing containers made from food-grade materials and avoiding the lowest-quality plastics that are more prone to odor carrying. A useful way to think about this is to envision safety through the lens of materials as well as processes. For instance, when evaluating material options, consider safer choices that align with both odor control and chemical leaching concerns. If you are curious about safer material choices in the broader sense, an example of safer, plastic-free options is illustrated by plastic-free, food-grade cups that are designed for food contact and do not rely on standard polymer formulations that can contribute to odor transfer. plastic-free, food-grade disposable cups. This example anchors the principle that material safety and odor control go hand in hand, and it underscores the value of choosing containers designed with odor resistance in mind. While this chapter emphasizes the drying process as a shield against odors, it also recognizes that odor control is part of a holistic strategy. That strategy includes selecting the right container materials, avoiding heating plastic containers when possible, and adopting a drying routine that minimizes residual moisture. In this way, the habit becomes a daily practice that protects taste and safety. It is worth noting that the drying step does not exist in a vacuum. It interacts with the other practices outlined in the broader guidance: rinsing, using warm water and mild dish soap; considering alternative materials such as glass or stainless steel; and acknowledging that even brief heating may release microplastics if the container is not properly conditioned or dried. Recent reviews and health communications emphasize that even small amounts of heat can cause plastics to release microplastic particles, and that the combination of heat and moisture can intensify this release. Therefore, ensuring complete dryness is not just about odor control; it is part of a broader risk-reduction approach to food storage. This approach aligns with the practical, science-informed recommendations that guide daily kitchen routines. It is also compatible with the broader goal of reducing chemical exposure from food-contact materials, a goal that public health authorities continue to stress through education and guidance. Finally, to anchor the science in practical action, it helps to keep in mind a few core points. Wash containers with warm water and mild soap, rinse thoroughly, and allow them to dry completely before storing. Do not rely on towels to dry, as lint can harbor microbes and odors. When feasible, expose PP or PE containers to sunlight for a limited period of four to six hours to accelerate drying, but avoid sun exposure for PC plastics to prevent degradation or discoloration. Store dry containers in a clean, dry, cool, and dark environment, and consider odor-absorbing aids like activated charcoal or dried tea leaves during long-term storage. By integrating these steps, you create a robust barrier against plastic odors that could compromise the flavor of your food. For readers seeking authoritative guidance on safe materials and storage practices, consult official resources on food contact materials from health authorities. External resource: https://www.fda.gov/food/food-contact-materials/food-contact-materials-101
Storing with Sense: How Proper Container Practices Ban Plastic Odor from Your Food
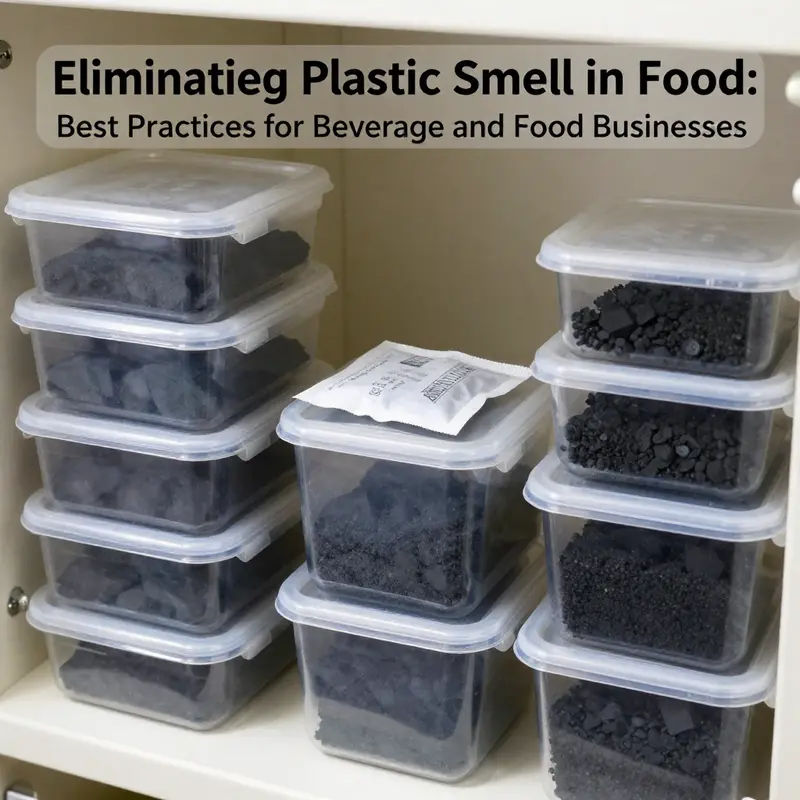
Odor is not simply a nuisance when plastic smells creep into your meals. It is a signal about how containers interact with the foods they hold, especially under certain conditions. When you store, heat, and wash with care, you reduce both the immediate scent and the longer-term risks of chemical migration. The science behind odor transfer centers on the chemistry of plastics, where additives and plastics themselves can release volatile compounds. These compounds are more likely to migrate into foods that are warm, fatty, or acidic, and they can linger even after washing. Your best defense is a deliberate routine that starts with choosing the right materials, continues through careful handling of hot versus cold foods, and ends with thorough cleaning and smart storage. In this way, storage becomes a shield rather than a source of unwanted flavors.
A practical starting point is material choice. Not all plastics are created equal for contact with food. Materials marketed as food-grade and designed for repeated use stand a better chance of resisting both odor absorption and unwanted leaching. In particular, polypropylene with a designation such as PP #5 is widely recommended for its chemical stability and relatively low permeability to flavors and oils. This is not a guarantee of perfection, but it is a meaningful improvement over lower-grade plastics or containers with unclear composition. A second option with strong performance characteristics is a tough, BPA-free copolyester used in many durable, reusable containers. While the exact formulations vary, the principle is the same: a structure that resists reacting with food and that does not readily harbor volatile compounds. By prioritizing these materials, you establish a foundation where odors are less likely to cling or re-emerge during storage. For readers who are curious about non-plastic routes, it’s useful to keep in mind that glass and stainless steel offer the lowest risk of odor retention and leaching, a point we will return to when considering long-term storage strategy. If you’re exploring non-plastic options, a look at eco-friendly paper cups and bowls shows an accessible path; see an example here: eco-friendly paper cups for take-away coffee.
Beyond material choice, the handling of hot foods matters deeply. Temperature is a driver of chemical mobility. When you pour hot soups, stews, or hot beverages into a plastic container, you set up a chain reaction: the heat can soften the plastic, expand microscopic pores, and accelerate the release of volatile compounds. The consequence is not only a temporary plastic aroma but also the potential for microplastics or additives to migrate into the food. The simplest and most reliable precaution is to cool hot foods to room temperature before transferring them to any plastic container. This simple cooling step reduces the stress on the container’s molecular structure and minimizes the opportunities for odor to form or cling.
Oily and acidic foods require equal attention. Oils and fats can penetrate tiny imperfections in plastic, and strong flavors can become trapped in the polymer matrix. In practice, this means reserving plastic storage for foods that are less prone to interact with the container’s interior, or choosing glass or ceramic options for items like salad dressings, marinades, sauces, fried foods, or citrus-heavy dishes. Hot coffee or tea kept in plastic for a long period can also pick up a plastic note, even when the liquid itself is not hot at the moment of storage. The upshot is straightforward: be selective about what you place into plastic, and when in doubt, opt for a non-plastic alternative for certain high-risk foods.
Cleaning is where odor trouble often begins and ends. After every use, washing plastic containers with warm water and a mild dish soap is essential. Thorough rinsing removes surface residues that can trap odors. For stubborn smells, several time-tested approaches work. A soak in a solution of white vinegar mixed with water—a 1:3 ratio—and left for a couple of hours can neutralize many volatile compounds. Another reliable method uses baking soda dissolved in warm water; this natural abrasive helps lift lodged residues that harbor odors without risking damage to the container. In either case, a thorough rinse afterward is crucial. These practices align with the broader idea that odor management is an ongoing effort, not a one-time fix. A light scrub should be gentle to avoid micro-scratches, which can harbor odor particles and become long-term odor reservoirs. If a smell persists despite washing, repeat the soaking or switch to a larger baking soda soak with fresh water to refresh the interior. Drying completely is the next critical step.
Drying is more than a housekeeping detail. Trapped moisture inside a container creates an inviting environment for bacteria and mold, both of which can generate their own unpleasant odors. The simplest rule is to dry the container completely and store it in a well-ventilated area. Leaving the lid off or ajar in a clean, dry space allows any residual moisture to evaporate and reduces the chances of a moldy scent taking hold. For long-term storage, consider storing containers in a cool, dry place and, if feasible, in a manner that ensures air can circulate around them. A small precaution some households use is to place a neutral odor absorber inside long-term storage containers. Activated charcoal or a few dried tea leaves can help mop up lingering odors. These strategies are not only practical but also gentle on the environment, as they minimize the need for harsh chemical fragrances or repeated heavy washing.
The decision to store and handle with plastic is not a binary choice. It is a spectrum of risk management, informed by the type of food, the temperature of storage, and the time for which the container will be in use. Short-term storage of mild-flavored or non-oily foods in plastic can be acceptable given proper cooling and immediate consumption. For meals that require refrigeration for several days, particularly those with oil or acidity, it may be wiser to switch to glass or stainless steel containers. These materials resist absorbing odors and do not leach additives, making them a safer default for long-term storage. The general recommendation from food safety and consumer guidance is to move toward uniform, durable storage solutions whenever possible; this reduces variability and makes it easier to maintain a clean, odor-free kitchen.
In practice, an integrated storage routine emerges. Start with material choice—favor food-grade polypropylene or a robust, non-reactive copolyester for everyday use. Then approach each food type with care: cool hot items before container transfer; prefer glass or ceramic for oily, acidic, or highly flavorful items; and keep cold foods in containers that maintain their cold temperature without encouraging condensation or odor formation. Cleaning becomes a ritual: wash promptly, use vinegar or baking soda as needed, rinse well, and dry thoroughly. Storage then benefits from a dry, ventilated environment with optional odor absorbers to handle odors that linger despite best efforts. This combination of forward planning and careful maintenance creates a kitchen that not only tastes better but also smells cleaner and more inviting.
The long view invites contemplation of alternatives. Glass and stainless steel containers provide the strongest protection against odor and chemical leaching, especially for daily or prolonged storage. They are easier to clean to a pristine state and are less prone to retaining odors than porous or less dense plastics. Yet, readers should recognize that transitions take time and habit. A kitchen can evolve into a mixed system, using plastic for certain quick, short-term tasks while gradually expanding glass or metal options for meals you prepare in advance or freeze for later. A coordinated approach—consistent with the idea of a uniform, well-organized set of containers—can simplify kitchen routines, reduce cross-contamination of flavors, and ultimately lower the chance of any plastic odor affecting your food.
A coherent routine emerges from the details above, but it is the consistency that makes it work. When you commit to cooling hot foods before storage, selecting materials with proven stability, cleaning with gentle, odor-neutralizing solutions, and drying and storing methodically, plastic odor becomes an anomaly rather than a recurring problem. The goal is not to demonize plastic entirely but to manage it wisely. Your kitchen then becomes a space where science-informed choices and practical, everyday actions converge. In that convergence lies the real path to safer, more pleasant cooking and dining experiences, where the aroma of the meal remains true to its own flavors rather than being superseded by an off-putting plastic overtone.
For readers seeking further guidance on safer storage, recent consumer-focused health guidance emphasizes glass as a preferred option where feasible. Glass is non-reactive, displays no absorption of odors, and eliminates concerns about chemical leaching. The shift toward glass and similar materials aligns with broader food-safety practices that prioritize avoiding heat exposure and minimizing long-term plastic contact. The evidence from contemporary sources supports a simple ethos: reduce plastic exposure for hot and fatty foods, clean thoughtfully, dry completely, and consider non-plastic options for long-term storage. This approach preserves flavor while reducing the risk of unwanted odors and potential health concerns associated with prolonged plastic contact.
External resource for further context on storage choices and odor minimization can be found here: https://www.housedigest.com/health/safe-food-storage-glass-containers/
Final thoughts
In conclusion, maintaining high food quality in the face of potential issues like plastic smells is crucial for your food and beverage business. By carefully selecting food-safe materials, avoiding high heat and oils, employing systematic cleaning practices, ensuring containers are completely dry, and following proper storage guidelines, you can preserve the integrity of your food offerings. Ultimately, these practices will not only reduce foul odors but also enhance the customer experience, contributing positively to your brand’s reputation.