
Clear plastic cups are a staple in beverage service, particularly in bubble tea shops, restaurants, and catering services. While these cups offer a lightweight and cost-effective solution for serving drinks, maintaining their cleanliness is crucial for both hygiene and customer satisfaction. This article delves into the best practices for cleaning clear plastic cups effectively. We will explore immediate rinse techniques to prevent stubborn stains, recommend safe detergents and methods for effective cleaning, and tackle odor removal strategies to ensure your cups remain fresh. Implementing these practices will not only prolong the life of your plastic cups but also ensure a positive experience for your customers.
Rinse Now, Shine Later: The Foundational Habit for Keeping Clear Plastic Cups Pristine
The simple act of a thorough, immediate rinse after use sits at the heart of keeping clear plastic cups looking bright and feeling hygienic. It is the first line of defense against cloudiness, dull rims, and stubborn odors that creep in between uses. When a cup is left to sit with a film of sugary drinks, citrusy acids, or oily residues, the surface welcomes those particles to dry and set. Over time, the sheen of clear plastic can lose its sparkle, and odors can cling like a shadow. Rinsing right away, in warm water, is not merely a preliminary step; it is a habit that preserves clarity and longevity, acting as a pre-cleaning ritual that makes all subsequent washing easier and more effective. The logic is simple, but its impact is real: residues that are washed away while still pliable are far easier to remove than those that harden into film. For households that juggle cups for kids, guests, or on-the-go use, establishing this routine can transform a cluttered shelf into a category of everyday hygiene that feels reliable and almost effortless.
To understand why this matters, picture the inside of a cup after a sugary drink or a citrus beverage. The sugars cling to the plastic, the acids etch into the micro-roughness of the surface, and tiny oil droplets leave behind a slippery film. When that film dries, it forms a barrier that traps new residues with every reuse. The result is a halo of cloudiness around the rim and base, a faint but noticeable odor that lingers even after a soap-and-water wash, and a cleaning job that grows more laborious with each passing day. Immediate rinsing disrupts that sequence. It flushes away the most active offenders before they can bond to the surface. Warm water is the key here, because it dissolves sugars and oils more readily than cold water, and it does so without risking the gentler plastics that become stressed under heat. This is especially important for cups made from plastics that are more sensitive to heat, where the goal is to preserve clarity rather than alter shape or integrity.
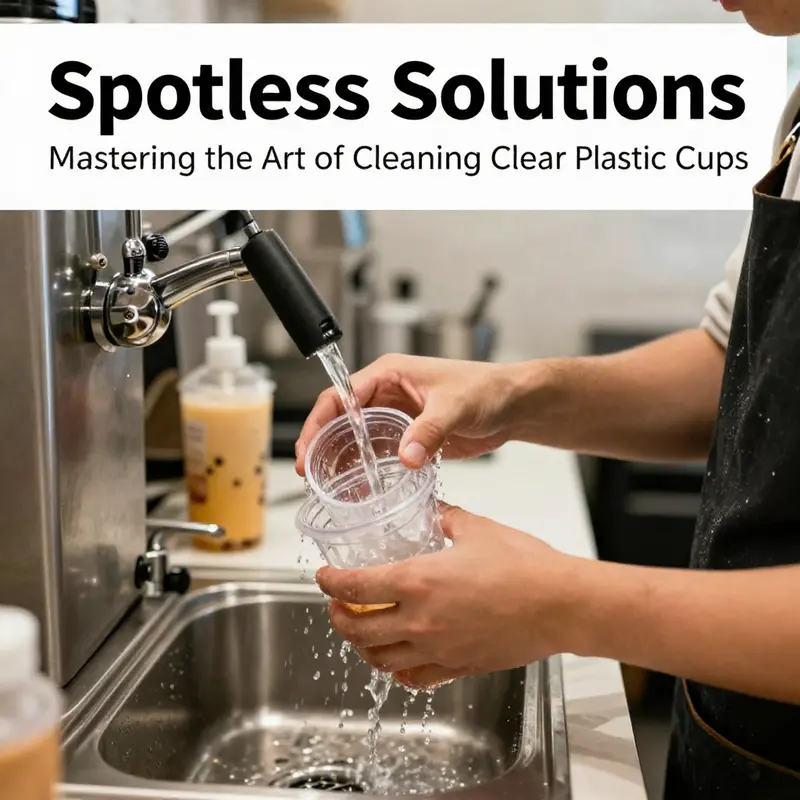
The practical act is straightforward, yet it benefits from attention to detail. After lifting the cup from a beverage, rinse it under a steady stream of warm water, letting the water reach every nook—the interior, the rim, and the lip where the cup meets the air. The interior is the priority, but the rim deserves equal care because residues accumulate where lips press and where air interacts with the cup’s edge. Swirl the water to loosen any clingy particles, then tilt and rinse from multiple angles to ensure that nothing hides in a corner or a contour. For beverages that leave a heavier footprint—cola with caramel color, citrus with bright zest, or tea with tannins—the rinse should be brisk and comprehensive. The goal is a cup that looks and feels clean at a glance, with no visible film or slippery spots on the surface.
A common question is whether a rinse should be done with hot water. The answer, in most home settings, is no. Hot water can begin to deform certain plastics over time, particularly if the cup is of a material sometimes labeled with #7, which can indicate polycarbonate. That warning isn’t just about potential chemical leaching in extreme conditions; it also concerns how heat can affect the structural integrity of the cup. Warping can trap residues, creating new pockets where grime can hide. Warm water—comfortably warm to the touch but not scalding—offers the right balance: it dissolves sugars and oils effectively while protecting the plastic’s shape and clarity. The rinse becomes not only a hygienic step but a preventive one, guarding against future cloudiness caused by heat damage or repeated thermal stress.
After a thorough warm-water rinse, the cup should be drained promptly. Leaving water to sit inside, even for a few minutes, allows minerals from the water and tiny deposits from the previous beverage to re-set or re-suspend. A few minutes can make a difference in whether those residues become harder to remove in the next full wash. For households that stock a rotating set of clear cups, this fleeting window can be enough to prevent stubborn rings around the base or a hazy film along the interior surface. It also helps reduce the risk of microbial growth between uses, since the interior is drier and less hospitable to organisms that thrive in standing moisture.
In practice, immediate rinsing should be paired with a light but mindful following wash routine. The goal is not to replace the daily washing with a rinse but to set the stage for it. Once the cup has been passively rinsed, a routine wash with a mild detergent and a soft sponge completes the cleaning cycle without abrading the surface. Harsh scrubbers, including steel wool or abrasive pads, can scratch the plastic and invite micro-scratches where residues and bacteria can hide. A soft sponge, or a gentle cloth, paired with a mild dishwashing liquid is the recommended combination. If the cup is frequently used for sweetened beverages, a quick rinse plus a daily wash becomes a reliable rhythm that preserves clarity and feels reassuringly clean every time it is picked up.
The habit also shines when considering how it scales across a busy kitchen, a family routine, or a casual office setting. In kitchens where several cups are used in quick succession, one person’s immediate rinse can become a shared standard. Instead of letting cups accumulate in a sink or a drying rack with faint odors, each cup is attended to the moment it’s emptied. The cumulative effect is striking: fewer stubborn residues at the end of the day, less time spent scrubbing, and a visibly brighter set of cups that stay clear and inviting through weeks of use. When a routine like this is embedded into daily practice, it becomes almost mechanical—a small ritual that yields outsized results with minimal effort.
To help translate this into action, consider a simple mental check rather than a complex procedure. As soon as a cup is emptied, briefly inspect the interior. If any visible residue clings to the sides or the bottom, give the interior a quick rinse with warm water, swirl, and tilt to rinse from all angles. If there is a faint scent, a slightly longer rinse may be warranted. This mental cue—inspect, rinse, swirl—keeps the practice compact and repeatable, ensuring that the cup remains bright and ready for its next use.
The integration of immediate rinsing with a broader cleaning routine should feel seamless, not burdensome. After the short rinse, proceed with a standard wash using a gentle dish soap and a soft sponge. Rinse again to remove all soap residues, then dry the cup upside down on a clean dish rack. Drying not only speeds up readiness for the next use but also prevents moisture from lingering, which can encourage bacteria to take hold in quiet corners. The practice of drying upside down ensures gravity helps water to escape from the interior, including the rim’s underside, where dampness can otherwise linger. The combination of a warm rinse, a gentle wash, a thorough rinse, and proper drying creates a dependable cycle that keeps clear plastic cups looking pristine and feeling hygienic over time.
Towards the end of this chapter’s strand, it is helpful to connect the immediate rinse to longer-term considerations. Clear plastics can vary in composition, and some types may accumulate odors more readily than others. If upon inspecting a cup you notice persistent odors despite regular rinsing, a longer odor-removal strategy can be layered into the routine without compromising the core rule of immediate rinsing. Simple, non-abrasive methods—such as a vinegar soak, a baking soda paste, or a citrus-based rinse—can be employed periodically to rejuvenate cups that have been in service for longer periods. These methods are not a substitute for the quick rinse, but they complement it, addressing odor compounds that can cling to plastic and become more stubborn over time. When used judiciously, they preserve the cup’s clarity and extend its usable life, reducing waste and the need for replacements.
In this regard, the final step of proper drying and storage remains essential. A cup that has been rinsed promptly and washed with care should never be stacked while still wet, and it should not be left to air-dry in a damp environment where mold or mustiness could take root. Instead, allow space on a dish rack to ensure ample air circulation. A clean, dry surface is a silent ally in maintaining the cup’s pristine appearance. And if a set of cups shows repeated signs of cloudiness despite consistent rinsing, it may be worth revisiting the materials themselves. Some plastics respond better to repeated cleaning than others, and the recycling code printed on the bottom of a cup can provide a quick guide to its durability and safety for reuse. Cups coded #1 (PET), #2 (HDPE), or #5 (PP) are generally safer for repeated use, while #7 (PC) can raise concerns about BPA exposure in certain conditions. While most household cleaning remains within safe expectations, choosing the right material for repeated use minimizes risk and maximizes lifespan, reinforcing why a good rinse is not just a hygiene habit but a smart material choice over time.
The chapter’s core message is simple and repeatable: rinse promptly with warm water to prevent residue from drying and hardening, then wash with a mild detergent using a soft sponge, avoid exposure to high heat or dishwasher cycles, and dry properly. In practice, this becomes a steady rhythm—a daily routine that preserves the cup’s clarity and usefulness. It is a habit that, once established, reduces the need for aggressive cleaning later and keeps the cup looking as clear as the day it was purchased. For those who want to see the connection between a single habit and long-term results, consider how this quick rinse sets up the next cleaning steps for success. The path from rinse to spotless cup is a straight line: remove the easy stuff while it is easy to remove, then complete the rest of the cleaning with care. This is not merely about maintenance; it is about preserving the visual appeal and the sanitary integrity of a tool that travels through daily life with us.
To connect the reader with a practical example, imagine a family of four with varied beverage preferences. One child loves fruit juice; another drinks sweet iced tea; a third tends toward milk, while a fourth often grabs water. Each cup is a small stage where different residues perform their acts. When each cup is rinsed immediately, the unnoticed residuals never get the chance to set into a stubborn crust. The result is a signal of order and cleanliness: a kitchen that feels lighter, a shelf that gleams, and a daily rhythm that reduces stress around cleanup. The cost of maintaining this habit is minimal, while the payoff—the continued clarity and hygienic assurance of the cups—remains high. This is the essence of the immediate rinse: a modest effort with a lasting payoff that aligns with a broader commitment to practical, long-term cup care.
For readers seeking a concise reference within the broader cleaning framework, this immediate rinse technique anchors every subsequent cleaning step. It serves as a reminder that good hygiene starts with awareness of what happens right after a drink ends. By making the rinse a default response, households create a structure in which cups transition smoothly from use to wash to dry, and back to use again with minimal friction. In a time when convenience often competes with cleanliness, this habit stands out as a reliable, low-effort practice that protects clarity, preserves the material, and keeps odors at bay. It is the kind of foundational discipline that everything built on top of it—gentle washing with mild detergents, odor-removal techniques when necessary, and careful drying—can thrive on. And as you move forward in the guide, you will see how these careful habits weave together to form a comprehensive, resilient approach to keeping clear plastic cups clean and ready for everyday life.
Internal link reference for continued practical context: for a detailed product-oriented example that complements the cup-cleaning routine, you can explore a page focused on customized disposable single-wall paper ice-cream cups with lids, which demonstrates how lids can influence post-use handling and cleaning considerations. customized disposable single-wall paper ice-cream cups with lid.
External resource for deeper insight into long-term cup care: The Ultimate Guide to Washing Reusable Plastic Cups for Longevity. https://www.cleanwithconfidence.com/guides/reusable-plastic-cup-care
Preserving Clarity: A Gentle, Thorough Approach to Cleaning Clear Plastic Cups
Clear plastic cups can be surprisingly unforgiving to careless cleaning. A surface that looks pristine to the eye can hide microscopic scratches, faint clouding, or stubborn odors that only reveal themselves after a few uses. The goal is not simply to remove residue, but to do so in a way that preserves the cup’s transparency, while safeguarding your health and extending the life of the plastic. This chapter weaves together practical routine steps with a deeper understanding of how different cleaning choices interact with common clear plastics. It is a narrative of small, mindful decisions that accumulate into a long, clear lifespan for cups that are frequently reused. The core principle is gentleness paired with consistency: a mild touch on every surface, a routine that becomes second nature, and a vigilance for signs that a cup may be nearing the end of its usable life.
From the moment a cup leaves a drink, it begins a quiet process of aging. Residue can dry into sticky films that attract dust and microbes, and heat can misalign the plastics’ internal structure. The first line of defense is immediate action. After every use, a quick rinse under warm running water helps wash away sugars, dairy fats, fruit acids, or lingering beverages. This rinse does not need to be elaborate. The aim is to prevent the residue from drying and becoming difficult to remove later. In practice, this is a short, calm rinse, followed by a hand wipe or a gentle scrub with a soft sponge at the end of the day. The goal is not to rub aggressively, but to dislodge what might otherwise dry into the micro-scratches or stubborn films that cloud the cup’s interior.
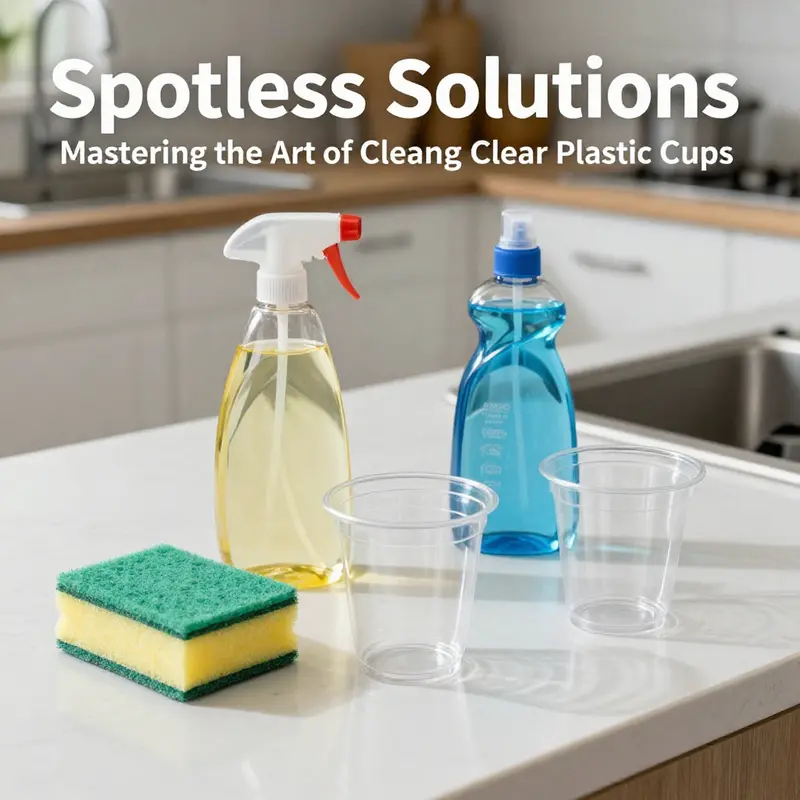
The next layer of care centers on appropriate detergents and tools. A mild dish soap, one formulated for reusable plasticware, provides enough grease-cutting power to clean without stripping the surface. Harsh chemicals, including aggressive bleaches, can dull the clarity and even erode the microtexture of certain plastics. The recommended tools are a soft sponge or a microfiber cloth. These are gentle on the surface yet effective at lifting oils and residues. For cups with stubborn residue or very narrow rims, a bottle brush designed for narrow containers becomes invaluable. This combination—mild detergent, lukewarm water, and non-abrasive tools—gives you a reliable base for routine cleaning.
As with any cleaning routine, temperature matters. Hot water can warp certain plastics, particularly polycarbonate, and repeated exposure to high heat can contribute to micro-cracking and a haze that reduces transparency. Dishwashers pose a similar risk. The combination of high heat and powerful detergents can degrade plastic over time. A careful rule of thumb is to avoid the dishwasher entirely unless the manufacturer explicitly labels the cups as dishwasher-safe. If in doubt, treat the cups as hand-wash-only items. This is not about fear of damage; it is about preserving a clear surface that remains inviting to use and easy to inspect for cleanliness.
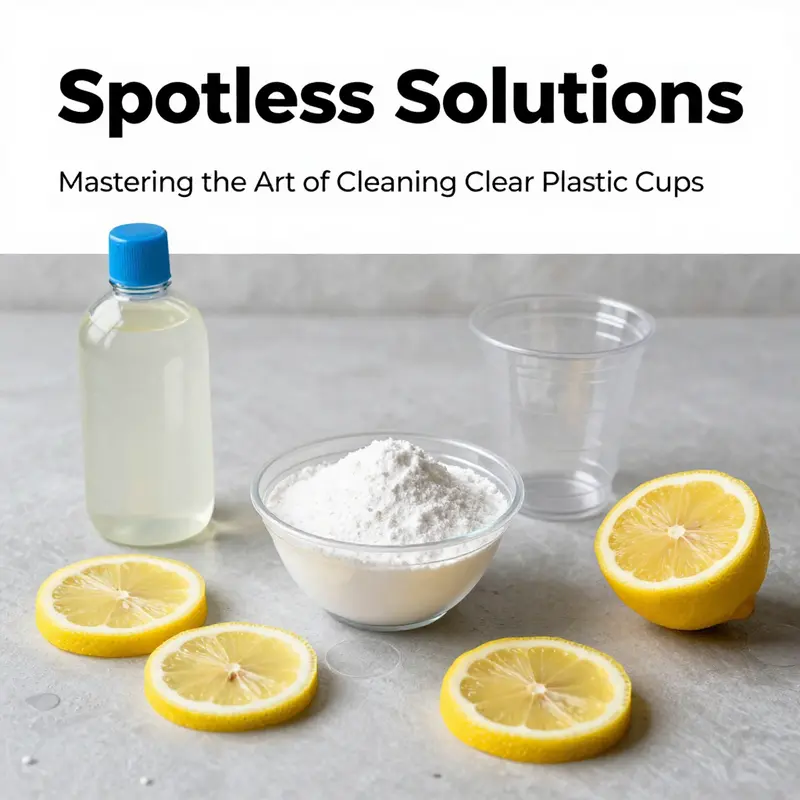
When odors or subtle new-cup smells linger, the intuitive responses—strong cleaners, bleach, or aggressive scrubbing—are tempting but often counterproductive. The better approach is targeted odor removal that respects the plastic’s structure. There are several time-tested methods that can break down odors without harsh exposure. A simple vinegar soak, for example, uses equal parts white vinegar and water. The cup is filled to cover the interior and left to sit for 30 minutes, or longer for stronger odors. After the soak, the vessel is rinsed thoroughly. A second option is a baking soda paste. A paste made of baking soda and water gives a gentle abrasive action on the interior, especially around the rim and base, without scratching. The paste sits for 10 to 15 minutes before a thorough rinse. Citric acid from lemon juice is another ally; rubbing the inside with a lemon slice or adding lemon juice and letting it sit creates a fresh scent while helping to neutralize odors. Finally, for cups that have previously held tea or coffee, an indirect deodorizing method can help: fill the cup with used tea leaves or grounds and hot water, then let the mixture steep for several hours before discarding and rinsing. Each of these methods relies on mild acidity, gentle contact, and thorough rinsing to avoid leaving any residue that might affect taste or safety.
Drying plays a more important role than many people realize. Humidity left inside a reused cup can foster bacterial growth, and droplets left on the interior can create watermarks that draw the eye as well as the nose. The recommended practice is to dry the cup upside down on a clean dish rack after washing. This ensures any remaining water can drain away and prevents moisture from pooling inside. A well-ventilated drying area helps maintain a clean, odor-free environment, and it reduces the chance that residual moisture becomes a breeding ground for microbes. If you must air-dry elsewhere, consider positioning cups with the rims canted slightly downward so gravity assists drainage rather than trapping water at the base.
An awareness of recycling codes adds an additional layer of care to your cleaning decisions. The bottom of many clear cups bears a recycling code. Cups marked with #1 (PET), #2 (HDPE), or #5 (PP) are generally safer for repeated use and more likely to withstand gentle cleaning without developing cloudiness. In contrast, cups marked #7 (PC) may contain Bisphenol A (BPA) or other additives of concern, especially when heated. While occasional reuse of #7 cups has occurred in the past, the safer course is to minimize exposure to heat and to replace them after a reasonable period of use. This knowledge does not condemn all #7 plastics outright; it simply informs a more cautious use pattern and clearer expectations about long-term performance.
The practical rhythm of cleaning clear plastic cups then becomes a matter of routine, not a one-off effort. Basic cleaning starts with lukewarm water and mild dish soap. The sponge glides in long, even strokes across the interior, moving from rim to base and then to the exterior, lifting film without scratching. A thorough rinse under a gentle stream of running water removes soap residue and any loosened particles. If the cup holds a particularly stubborn film, a second pass with the same mild soap helps lift it. This approach aligns with the broader conclusion from experienced cleaners: hand washing with lukewarm water and a gentle detergent is the most reliable way to maintain the cup’s clarity and longevity. Harsh chemicals, aggressive scrubbing, and extreme heat are not necessary and can be counterproductive to your long-term goals.
For more persistent stains or odors, a short, targeted intervention can be employed without deviating from the gentle-cleaning philosophy. A small amount of baking soda sprinkled inside the cup, then swirled with a little warm water, creates a mild abrasive action that helps break down residues in difficult-to-reach corners. After about 15 minutes, the cup is rinsed thoroughly. If there is still a lingering smell, the vinegar soak described earlier can be revisited—this time with a shorter contact time to avoid excessive acidity. It is essential to rinse again after any odor treatment to remove any residual acidity that might alter taste or safety. These methods are designed to work in harmony with the cup’s material, preserving both clarity and structural integrity.
Deep cleaning becomes necessary only when residues reside in hard-to-reach areas, such as the base’s interior corners or the narrow rim’s edge. In those cases, a bottle brush with a slender neck and soft bristles can reach where a sponge cannot. The key is to apply light pressure and maintain a steady, circular motion. The goal is to loosen buildup without wearing down the plastic’s surface. After cleaning, a thorough rinse ensures no fibers or brush bristles remain, which could create micro-scratches or harbor hidden residues. Deep cleaning should be used sparingly, as part of a broader maintenance routine rather than as a regular daily necessity.
Looking beyond the mechanics of washing, it is helpful to consider why this approach works for most clear plastic cups that are intended for repeated use. The combination of a mild detergent, non-abrasive tools, warm but not hot water, and mindful odor-management practices preserves the cup’s surface properties. It keeps the surface smoother, reduces micro-scratches that catch light, and thereby maintains transparency. Clarity is not just about appearance; it also signals cleanliness. When a cup remains clear, it is easier to inspect for any cracks, pitting, or clouding—signs that might indicate it is time to retire the cup from daily use. The habit of drying upside down on a rack, with proper air circulation, further reinforces this overall hygiene standard by ensuring that no unseen damp pockets linger where mold could take hold.
In practice, the narrative above translates into a simple routine with room for flexibility. For regular daily use, wash promptly with lukewarm water and a mild dish soap, rinse thoroughly, and dry on a rack. For stubborn odors or residues, apply a vinegar soak or a baking soda paste, then rinse. If any area remains difficult to reach, employ a bottle brush and take the time to reach every contour. If you ever wonder about whether you should put a cup in the dishwasher, remember the guideline: avoid the dishwasher unless explicitly labeled dishwasher-safe by the manufacturer. This single caution helps protect your cups from heat-induced warping, clouding, or structural fatigue that could otherwise shorten their usable life.
The value of this approach becomes especially evident when you consider the broader ecosystem of reusable plastic wares. The same principles—gentle detergents, non-abrasive tools, mindful handling of heat, and regular inspection—apply to other items in the lineup. If you are curious about how these ideas translate to paper or kraft-based products that accompany many beverage programs, you can explore related options on the product pages of the site, such as senang01-hot-sale-customized-disposable-single-wall-paper-ice-cream-cups-with-lid. This reference, while focused on a different material, reinforces the conceptual link between careful cleaning, material compatibility, and longevity across a family of reusable or semi-reusable wares. The main takeaway remains consistent: a minor, consistent routine done with the correct tools yields durable, clear results rather than periodic, aggressive scrubbing that might leave more lasting marks.
In the end, your goal is to maintain a clear, clean cup that faithfully reflects the beverage within and the care you invest in it. The chapter’s guidance—rinsing promptly, choosing mild detergents and soft tools, avoiding heat and dishwashers, employing odor-eliminating methods with care, drying properly, and being mindful of the plastic’s composition—provides a framework that can guide everyday decisions. It supports a steady practice that reduces the likelihood of clouding, scratches, or lingering smells, while ensuring your cups remain visually appealing and safe to reuse.” External resource: https://www.thespruce.com/how-to-clean-reusable-plastic-cups-4782962
Breathing Freshness Into Clear Cups: A Cohesive Guide to Odor-Free Cleaning of Transparent Plastic Cups
Clear plastic cups carry a quiet expectation: they should look pristine, smell neutral, and be ready for the next pour. When residues linger, or odors cling to the inside, the impression shifts from clean to questionable. This chapter weaves together practical steps, gentle methods, and mindful precautions so you can restore and maintain the clarity of your cups without exposing yourself to unwanted chemicals or heat damage. It is a practical narrative about routine care, not a catalog of treatments, because consistency matters as much as the method itself. The goal is not merely to remove smells but to create a reliable cycle of cleaning that preserves the integrity of the plastic while keeping its appearance bright and inviting. Odors in clear cups often originate from tiny residues that dry and bake into unappealing scents. Water alone can begin the process, but residues demand a bit more attention. A deliberate sequence helps. Start with a thorough but simple rinse, then move through a measured washing routine that respects the material. This approach does more than mask smells. It helps prevent buildup that can harbor bacteria and degrade the surface over time. When odor is persistent, patience with a staged treatment pays off. A few minutes of soaking or a careful paste can yield results that a quick rinse alone cannot. The aim is not to chase a temporary fix but to establish a routine that keeps cups looking and smelling fresh through repeated use. The material itself matters. Most clear cups are made from plastics that respond differently to heat, detergents, and acids. Some are designed for repeated use and can tolerate routine washing, while others are more fragile or prone to odor retention if mishandled. Understanding the basics of material behavior helps you choose the right cleaning approach and avoid actions that could warp, cloud, or degrade the surface. The simplest truth is this: what you put in and how you treat it determines what comes out. If you begin with a clean slate, your cups will require less aggressive intervention later. Consider the residue that forms after a beverage sits for a while. Still water, tea, juice, or even plain water can leave a faint film on the inner walls. That film, if left unchecked, becomes the home for odor molecules. The most effective strategy respects the plastic and treats the source of odor rather than merely masking it. In practice, this means a calm, consistent routine rather than sporadic scrubbing with harsh tools. Begin with the basics. After each use, rinse the cup promptly with warm water. This simple step prevents sticky residues from drying and becoming harder to remove. Warm water is helpful because it loosens oils and sugars more effectively than cold water. The goal is to reduce the amount of residue that must be tackled later. Once the cup has been rinsed, apply a mild detergent. Use a gentle dishwashing liquid and a soft sponge or cloth. Abrasive pads, steel wool, or rough brushes may scratch the surface. Scratches can trap odors and give the cup a dull, less transparent appearance over time. The choice of tool matters as much as the choice of soap. A soft sponge helps lift residues without abrading the plastic. A microfiber cloth can be a good alternative for routine cleaning, especially when a cup only needs a quick refresh between uses. The temperature of the water during washing matters, too. Hot water might feel efficient, but it can stress certain plastics differently than mild temperatures. When a cup is exposed to excessive heat, especially when placed in a dishwasher, the heat can warp the walls and alter the optical clarity. It can also accelerate chemical leaching in certain formulations. To avoid this, never place clear plastic cups in a dishwasher. The heat cycles and elevated temperatures are simply not compatible with many plastics used in consumer cups. Boiling water should also be avoided. Pouring boiling water into a cup, or exposing it to sudden high heat, can cause distortion or release trace chemicals in some types of plastic, particularly those marked with certain recycling codes. Awareness of recycling codes helps you gauge safety for repeated use. Look at the bottom of the cup for a recycling code. Codes like #1 (PET), #2 (HDPE), and #5 (PP) are generally safer for repeated use when cleaned properly. Codes like #7 (PC) can indicate the presence of materials that may release substances if heated. If a cup bears the #7 code, use with caution and avoid heating it or exposing it to hot liquids whenever possible. This is not a judgment about the product’s quality, but a precaution about how the material might behave under heating conditions. If odor is stubborn, a targeted approach can help. One option is a vinegar soak. Fill the cup with an equal mix of white vinegar and water, and let it soak for at least 30 minutes. For stronger odors, an overnight soak can be effective. After the soak, rinse thoroughly with clean water. Vinegar’s acidity helps neutralize many common odors without leaving a lasting chemical scent, provided it is rinsed well. A second method is baking soda paste. Make a paste with baking soda and water, then apply it to the inside of the cup with a soft brush or sponge. Focus on the rim and base where odors often linger. Let the paste sit for 10 to 15 minutes, then rinse thoroughly. Baking soda is gentle enough for most plastics yet potent enough to lift away lingering smells from dietary residues. A gentle lemon juice treatment can also help. Rub the inside with a lemon slice or sprinkle lemon juice inside and let it sit for 15 to 30 minutes. Citric acid helps break down lingering oils and imparts a fresh scent. Rinse well after the wait. For cups that have held tea or coffee, a different natural refresh can help. Fill the cup with used tea leaves or grounds and hot water, then let it sit for several hours or overnight. The tannins and aromas can help neutralize other odors, turning the cup into a clean slate once the mixture is discarded and the cup is rinsed. The use of these methods should be balanced. You want to neutralize odors without introducing new residues or carelessly harming the plastic. After any cleaning, always dry the cup properly. Place it upside down on a clean dish rack. Let air drain out any remaining water. This practice reduces moisture that could promote bacterial growth and helps preserve the cup’s clarity. Drying upside down also prevents water from collecting in the rim where odor-causing residues may linger. It is a small step, but it matters for hygiene and appearance. If you prefer, you can finish with a quick wipe using a clean, dry cloth, but avoid leaving the cup damp for long periods. The key is to prevent moisture from sitting inside, especially in warm environments that could promote microbial activity. The cleaning routine should align with your broader kitchen hygiene practices. It works best when it becomes a habit rather than a one-off event. Establish a predictable cadence: rinse immediately after use, wash with mild detergent and a soft tool, avoid heat and dishwashers, and perform targeted odor treatments only when needed. In this regard, your cups join a family of reusable wares that deserve consistent care. When you think about the cups’ lifecycle, routine cleaning supports both safety and longevity. Repeated exposure to heat and harsh abrasives can cause micro-scratches, micro-abrasions, or clouding that make odors more perceptible over time. Gentle handling preserves the surface and keeps the cup visually appealing. The practical aspects extend beyond odor control. A well-cleaned cup is less likely to harbor bacteria or mold in residual crevices. Even small amounts of moisture trapped between the rim and the interior can become a staging ground for microbes. Keeping those areas dry helps, and choosing a drying method that facilitates complete drainage is a prudent step. If you ever wonder whether your cup has retained an odor after cleaning, a simple sensory test can help. Smell the inside gently after drying. If the scent persists, you might retry one of the gentle odor-removal methods, ensuring you rinse thoroughly afterward. It’s important to maintain realistic expectations. Not every aroma will disappear instantly, especially if a cup has seen repeated exposure to aromatic beverages or intense flavors. Patience and a calm approach often yield the best results. In the long run, you’ll minimize future odor issues by using the right materials for the intended use. If the cup is particularly prone to holding onto smells, consider using cups designed for repeated use with more robust surfaces. Remember that even with careful cleaning, certain surfaces may develop a subtle haze or micro-scratches that affect transparency. These changes are usually cosmetic and do not necessarily indicate unsafe use, but they can influence how you perceive cleanliness. It helps to rotate cups or replace those that consistently show wear, especially if you need absolute clarity for beverages where appearance matters. The practical guidance above sits within a broader understanding of the cups themselves. Recognize that material choice influences how easily odors are released and how readily residues can be removed. This is not a critique of any particular product but a reminder that the same cleaning regime may work better on some cups than others. If a cup is especially opaque or shows persistent clouding after cleaning, consider whether the material is the right fit for repeated use in your setting. A simple check of the recycling code can guide decisions about reuse and disposal, aligning cleaning practices with environmentally informed choices. In addition to the direct cleaning steps, consider how the cups are stored between uses. Storage conditions matter. Keep cups in a cool, dry place away from direct sunlight. Sunlight can cause some plastics to become brittle or discolored over time, even if they appear clear. Humidity can contribute to a subtle mildew scent if moisture is trapped in stacks. Stacking practices matter as well. Avoid tight stacks that trap moisture between cups. If you need to store multiple cups, place them in a way that air can circulate and any residual moisture can evaporate. A light, breathable container is ideal. If you adopt these practices consistently, you will notice a reduction in odors and a preservation of visual clarity. The small, deliberate steps accumulate into a resilient cleaning routine that supports hygiene and user confidence. A helpful mental map is to classify cleaning actions as preventive, routine, and remedial. Preventive steps include rinsing and drying after each use. Routine steps involve the gentle washing with mild detergent and soft tools. Remedial steps apply only when odors persist, using vinegar or baking soda or lemon as targeted interventions. This framework keeps cleaning manageable and prevents the sense that cleaning is a daunting chore. When you encounter a tricky odor, think about the source. Is it from a beverage with strong aromatic oils? Is it from oils or sugars that cling to the inner walls? Understanding the source helps you choose the most appropriate method without overdoing it. If you experiment, proceed gradually. Start with the mildest approach that could address the odor. If that doesn’t suffice, escalate to a vinegar soak or a baking soda paste for a short period. Always rinse thoroughly after each intervention. Let the cup air dry completely before reuse. As you refine your routine, you can also consider documenting your preferred sequence. A simple checklist on a kitchen note can remind you of the steps in the right order, reducing the chance of skipping important stages. The repeatable nature of the process makes cleaning predictable rather than improvisational. Finally, link this practice to broader principles of hygienic food ware care. Treat clear cups as you would other utensils that handle food and drink. Gentle cleaning, avoiding excessive heat, and careful drying create a baseline of safety and clarity. The method is not about chasing perfection in every wash but about maintaining a responsible norm that minimizes odors and preserves material integrity. The end state is simple: clear cups that feel clean to the touch, smell neutral, and present with their intended translucence. The routine, when internalized, becomes almost invisible in daily life—performed with patience, precision, and a respect for the material. For readers who want to explore practical examples of cup design and usage within similar product ecosystems, see this internal reference: senang05-promotion-large-porridge-350ml-double-wall-eco-friendly-disposable-round-kraft-paper-soup-bowl-with-lid-cup-bucket. This link provides a sense of how different container designs influence handling and ongoing care, which can inform your approach to plastic cups as well. For further reading on odor reduction, you can consult an external guide that outlines practical odor-elimination steps in detail: https://www.wikihow.com/Remove-Plastic-Smell
Final thoughts
Maintaining cleanliness in clear plastic cups is not just about aesthetic appeal; it’s vital for customer satisfaction and health standards in any food service environment. By incorporating immediate rinsing techniques, using safe detergents for washing, and applying effective odor removal strategies, businesses can ensure their cups remain spotless and inviting. Remember, investing time in proper cleaning practices not only enhances your beverage offerings but also reflects your commitment to quality service. Keep serving with pride and commit to cleanliness for a superior customer experience.