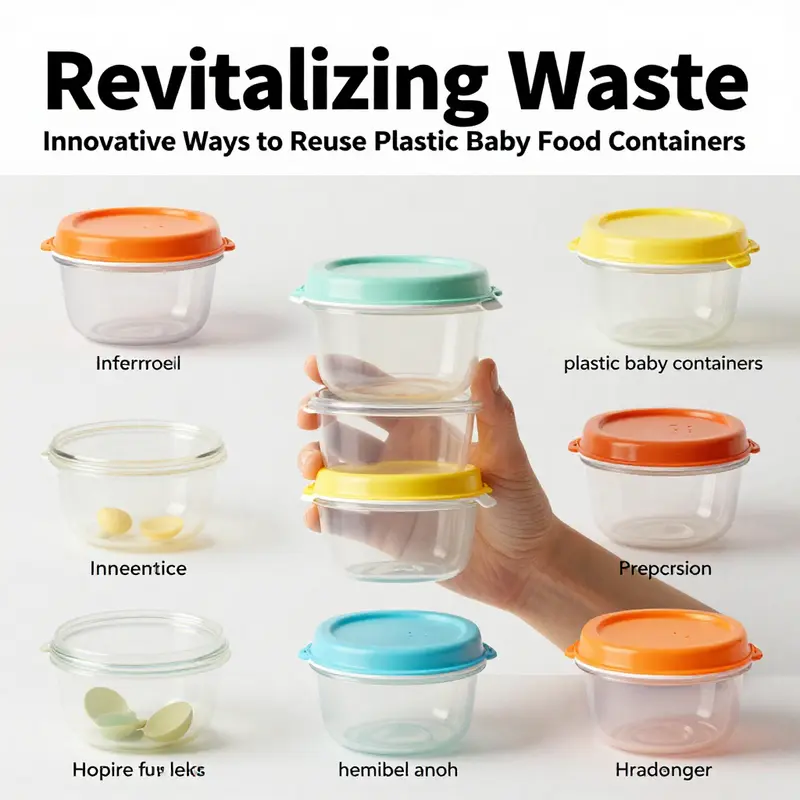
Plastic baby food containers, often viewed as mere waste, can serve a variety of innovative purposes in the food service industry. For bubble tea shops, beverage chains, restaurants, food trucks, catering services, and event planners, repurposing these sturdy and versatile containers can reduce environmental impact while creating functional solutions. From organizing craft supplies to serving meals, there are numerous creative strategies for reusing these containers. This article delves into five practical applications, highlighting how each can enhance your operations and reinforce your commitment to sustainability.
From Pantry Waste to Creative Workspace: Reimagining Plastic Baby Food Containers as Craft Organizers and Storage
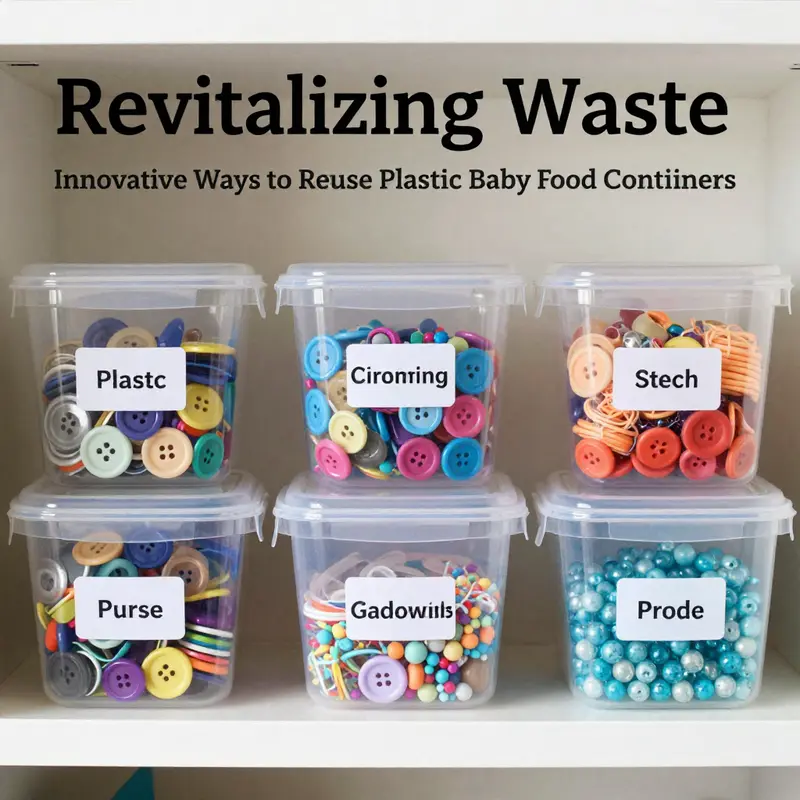
In the quiet economy of everyday life, small choices accumulate into big outcomes. A cluster of plastic baby food containers, once destined for the landfill after a child meal, can be reimagined as the backbone of a tidy, creative corner in the home. Their clear shells, compact sizes, and sturdy construction lend themselves to a new life as craft organizers and storage units. This is more than a simple upcycling trick; it is a way to align daily living with a mindset of resourcefulness and care for the environment. When you see potential in what’s disposable, you invite a habit of mindful design into your spaces, a habit that makes creativity easier, faster, and more enjoyable because the tools are already on hand and familiar in form.
The practical starting point is to understand what you’re handling. Most baby food containers are made from polypropylene, a durable plastic often labeled as #5. This material resists cracking, holds its shape well, and remains clear enough to see what’s inside at a glance. Those traits—resilience, visibility, and a compact footprint—are exactly what you want in a modular storage system. Yet safety matters, especially when considering reuse for food storage in the future. If a container has been heated or used for hot foods, it’s wise to retire that piece from any plan that reuses it for edible products. A thorough cleansing becomes non-negotiable: wash with warm, soapy water, rinse well, and scrub to remove any residue that clings to edges. A quick sniff test helps detect stubborn odors; if a smell lingers, or if the container shows cracks or warping, it’s best to repurpose it for non-food storage or recycle it.
Once you’ve cleaned and inspected, you can begin to see the potential for a single container to anchor a small, organized world. A clean, empty shell can become a tiny, transparent locker for beads, buttons, small brushes, or sewing notions that otherwise scatter across a shoebox. Labeling becomes a simple, satisfying ritual. A marker on the lid or a discreet sticker on the side keeps contents identifiable at a glance. If you want a more cohesive look, you can dress the exterior with fabric, wrapping paper, or fabric remnants using a light glue. The result is a personal touch that blends with your existing decor rather than standing out as a generic plastic tub. The key benefit is immediacy: you quickly see what you have, which reduces the impulse to buy more containers or duplicates of tiny supplies.
The power of uniformity comes into play when you start to work with several containers at once. A flat surface can become a modular map for organization. Lay out a tray or a thick piece of cardboard as a grid—imagine a 4×4 arrangement—and place each container in a cell, label-facing outward. You can secure them with a touch of hot glue for a permanent setup or use tape for a flexible, reconfigurable system. The result is a compact, scalable storage unit that can hold art supplies, office stationery, or even bathroom essentials. The beauty lies in the predictability: each cell is the same size, so you can add or rearrange with ease as your needs shift. When you’re in the flow of a project, this modular approach feels almost like a game of Tetris—satisfying, efficient, and visually calm.
A straightforward but effective enhancement is to create a dedicated sorting station for tiny items. You can cut the top off one container to form an open-top box that slides over a smaller vessel—perhaps a cup or a short jar—to create a two-tier sorter. Color-coded beads, different sizes of buttons, or distinct categories of fasteners can occupy each tier. The open-top nature of the upper tray makes it easy to scoop items with a quick hand gesture, while the lower compartment isolates them for counting, sorting by size, or mixing with other components. This approach is particularly helpful for families with kids who enjoy hands-on activities; it introduces sorting as a tactile learning moment and a chance to practice responsibility by returning items to their assigned containers.
As your organizational system grows, you can weave several containers into a larger, multi-piece set. By aligning multiple shells of the same size and joining them with a simple adhesive layer or tape, you can craft larger storage boxes that hold bulk materials—rolled felt, longer spools of thread, or stacks of fabric swatches. The uniformity makes stacking and labeling intuitive, so you can expand without fraying the visual rhythm of the setup. This isn’t about amassing more storage; it’s about creating a thoughtful system that respects how you work. When you can locate a needed item in moments, you reclaim time for creative exploration rather than hunting through clutter. In a world that often rewards speed over process, this patient assembly pays off in both serenity and efficiency.
For a desk or workspace, the containers work as upright dividers that keep tools within arm’s reach. Stand several shells on their rims to form a neat row of open cups for pens, pencils, scissors, and small tools. The transparent walls let you see what’s inside at a glance, reducing rummaging and the mental clutter that accompanies a cluttered desk. If you’d rather a flatter profile, arrange the units horizontally inside a shallow drawer with the labels facing up, creating a miniature filing system for art supplies or office essentials. The same idea translates to cable accessories and tiny parts—these little jars can contain assorted adapters, clips, and spare hardware, all organized in a single, easy-to-navigate module. The practice quietly enhances focus by turning a chaotic space into a calm, practical landscape where creativity can thrive.
Children often bring play into the mix, and the concept translates nicely into a contained play tray. Place containers on a large sheet of paper or inside a tray to designate a finite creative zone. The compartments keep paint, clay, or small scraps from spreading across the table, making cleanup faster and clearer. The lids can become mini scoops for craft materials, or be repurposed as tiny basins for paint swatches or glitter. This arrangement teaches children about boundaries and organization and also invites them to participate in maintaining order during and after a project. The act of arranging and re-staging the materials is itself a form of constructive play, one that reinforces fine motor skills and color recognition while reducing mess.
A gentler, more decorative reuse is the miniature garden idea. If you punch a few drainage holes in the bottom and fill the containers with potting mix, you can grow small herbs or succulents on a sunny windowsill. The containers’ size keeps the plants intimate and easy to manage, while their clear exteriors let you observe root growth and soil moisture. It also creates an appealing, green accent in a creative corner—a living reminder of how waste can be transformed into life-affirming, low-maintenance beauty. This little garden aligns with a broader sustainability mindset: it demonstrates that the daily choice to reuse can intersect with nurturing growth, both plant and personal.
All of these uses share a core idea: organization need not require buying new gear. You already own the shapes that work best for your world. The path from disposable to durable is paved with simple, repeatable steps. Begin with a thorough cleansing, remove any lids you won’t reuse, and inspect for damage. When in doubt, err on the side of safety and retire questionable pieces. Then move into a stage of gentle restoration—label what matters, consider decorative covers for a cohesive look, and arrange in a way that mirrors your daily routines. The result is a durable, flexible system that grows with you, rather than a static assortment of mismatched containers that do little more than gather dust.
This approach also invites reflection on why reuse matters. Avoiding unnecessary production and packaging reduces resource use and waste, and it invites a slower, more intentional pace of life. The act of repurposing a simple container becomes a mindful practice—an everyday example of how small, consistent choices can support a healthier home and planet. It’s not about perfection; it’s about progress. It’s about turning what might be discarded into a functional, beautiful part of your daily ecosystem. And because the containers are light and inexpensive to replace if needed, you’re encouraged to experiment, refine, and map out a system that truly fits your space and your life.
If you want a broader primer on similar upcycling ideas, a useful general guide exists that explores a range of creative transformations for plastic containers. The takeaway is consistent: look for compact, uniform shapes that can be linked into modular configurations and keep the contents clearly labeled so your system remains practical and easy to maintain. With patience and imagination, a humble container can become more than a shed of leftovers; it can become a reliable, repeatable habit that supports organization, creativity, and sustainability. For those curious to read more, a practical resource on versatile reuse is available at the external link below.
External resource for further reading: https://www.thespruce.com/creative-ways-to-reuse-plastic-containers-4155945
From Tiny Pots to Thriving Windowsills: Reusing Plastic Baby Food Containers as DIY Plant Pots
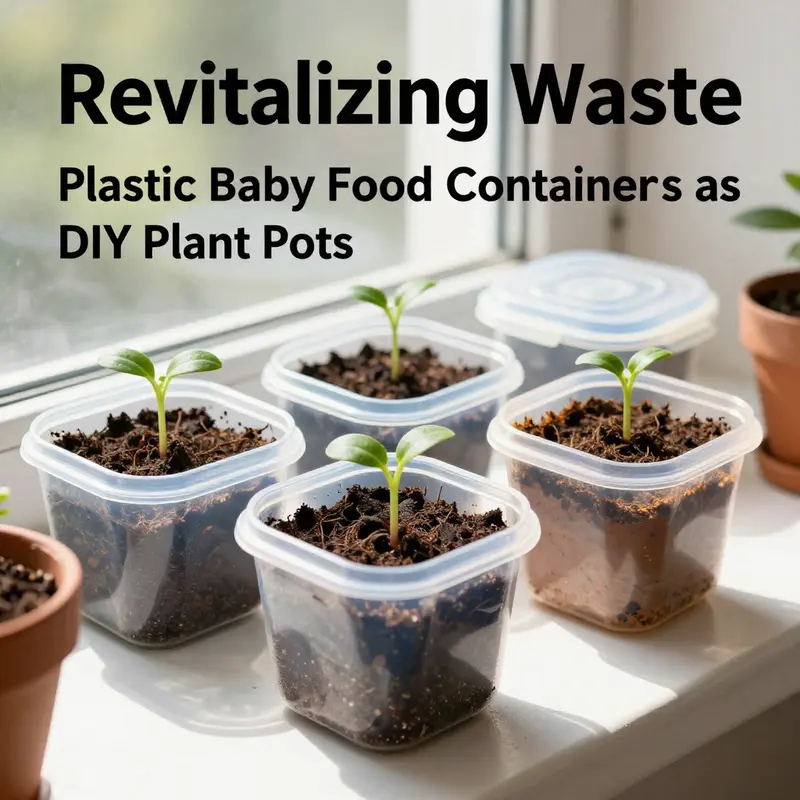
A small collection of empty plastic baby food containers can become a quiet pillar of a greener home garden. Look at the clear, perfectly formed shells and you see more than leftovers. You see tiny, ready-to-plant habitats that invite herbs, seedlings, and even the occasional succulent to take root. Reusing these containers as DIY plant pots is not just about saving a few cents; it is about closing a loop in your daily life. It is about turning what could become waste into a stage for growth and color on a sunlit windowsill, balcony rail, or kitchen ledge. The containers themselves are typically durable, BPA-free plastics such as polypropylene. They are light, easy to handle, and uniform in size, which makes them surprisingly versatile for small-scale gardening projects. The act of reusing them fits a broader ethos: thoughtful consumption, careful cleaning, and a recognition that sustainability can begin with something as modest as a kid’s snack cup.
To begin with, the concept is simple but powerful. Cleanliness is the foundation. A container that once held food can harbor residues that invite pests or foster mold if left unaddressed. A quick wash with warm, soapy water, a thorough rinse, and a complete dry are essential. The containers dry quickly, especially in a sunny kitchen, and this dryness is not just about aesthetics. It helps prevent mold growth in the soil and reduces the chance of damp odors that can accompany organic matter stored in unexpectedly damp plastics. The goal is a fresh, neutral starter space for roots to explore. Once clean and dry, the container stands ready for its next life as a plant pot. The size matters, too. Baby food containers are typically compact, with a depth that suits seed starting and the early stages of small herbs or succulents. They are easy to relocate if you decide a plant needs a brighter spot, and their lightweight construction makes them ideal for a family project or a first garden for children learning about plant care.
Crucially, drainage turns a pretty idea into a practical one. The first time you drill or poke holes in the bottom, you are acknowledging a plant’s need to shed excess water. A few deliberate holes—three to five—allow water to escape and protect delicate roots from rot. If you want to maximize air circulation, you can add a couple more small holes along the lower sides. It sounds technical, but it is really about giving the plant a fair chance. You may wonder about soil mixing at this scale. For seedlings, seed-starting mix is ideal; for tougher little plants, a cactus mix can be surprisingly forgiving and surprisingly well suited to the container’s modest volume. In both cases, fill the container to about an inch below the rim to leave space for watering and roots. As you tamp the soil, keep the plant’s base at the same depth as it was in its original container, then gently settle the soil around it so air pockets disappear. The result is a neat, compact rooting zone where moisture can be managed without wicking away nutrients too quickly.
Labeling has a quiet, practical value. A small label written with a permanent marker or taped tag helps you remember what’s growing and when to water. This simple habit becomes more important as you stagger multiple containers on a windowsill. The labels can be as plain or as decorative as you wish, and if you grow a kitchen herb garden, you might even pair each plant with a color-coded label to indicate water needs. The labeling practice also supports a smoother transition when the plants mature and you transfer them to larger pots or your garden beds. In this sense, the project becomes a stepping stone to more ambitious gardening goals, a way to test soil, moisture, and light conditions on a miniature scale before committing to bigger containers.
Placement is a factor of light, heat, and airflow. Most herbs thrive on a bright windowsill where they can sip daily sun. Succulents, on the other hand, appreciate a bit more air and a touch of warmth. For a set of baby-food pots, a south-facing or west-facing window is often ideal, but you can rotate containers to offer each plant a balanced day of light. If you are working with seedlings, you may want to start them indoors and move them outdoors after they hatch into sturdier plants. The small size of these pots makes it practical to experiment with microclimates—placing one pot in a warmer corner for a sun-loving herb while another sits in a cooler, partially shaded spot for a shade-tolerant herb. Watering, as with any container, follows a simple rhythm: water deeply until the liquid begins to seep from the drainage holes, then wait until the top inch of soil dries before the next watering. This measured approach avoids waterlogging, which can smother delicate roots in a pot this shallow.
Beyond the practical steps, there is a broader narrative about these little planters. They invite a quick, low-commitment experiment: will a bright seedling take hold here, or would it thrive better in a slightly larger container? Will a particular herb prefer more sun or more shade? The container becomes a tiny classroom where you observe growth, learn about moisture, and refine your method as you gain confidence. The beauty lies in how easily you can re-use and re-seat these pots as the plants in your home garden grow. The simplicity of the form helps beginners see results quickly, which can be endlessly encouraging and a stepping stone to more complex projects—like starting a balcony herb garden or cultivating a small collection of succulents on a sunny shelf.
There is also a mindset shift embedded in this practice. When you repurpose a container that once held baby food, you acknowledge that waste is not a fixed fate for a product. Instead, its value is extended through care and intention. This approach aligns with a broader wave of at-home sustainability where people look at ordinary objects as parts of a circular loop. The small act of turning a used container into a pot can remind a household that reusability is continuous and multi-layered. It also acts as a gentle education tool for kids and adults alike, illustrating how soil, water, sunlight, and careful handling interact to sustain life in a simple, contained space.
If you want to see a broader array of reuse ideas that include containers of all kinds, a practical roundup from a trusted craft and home guide offers a spectrum of approaches. It highlights that the underlying principle—thinking before discarding—translates across many everyday objects. This is not about perfection; it is about incremental change and the joy of watching something small become something that grows. For a concrete example of how these ideas translate into a broader toolkit of reuse, see senang-kraft-paper-octagonal-bowl-pet-lid-waterproof-eco-friendly-disposable-customizable-snack-pet-food-salad-containers-1l. The link takes you to a product page that demonstrates a similar ethos: modular, compact, and adaptable design that complements DIY gardening and other household reuse projects. senang-kraft-paper-octagonal-bowl-pet-lid-waterproof-eco-friendly-disposable-customizable-snack-pet-food-salad-containers-1l.
Important considerations should guide every reuse project. First, clean thoroughly before reusing, especially if the container previously held food. A scent-free, residue-free surface helps plants stay healthy and helps you monitor moisture more accurately. Second, check the recycling code on the bottom. Containers marked #5, which denotes PP or polypropylene, are generally safe for reuse, but avoid those that have been exposed to high heat. If you ever plan to reuse a container for food again, resist microwaving or washing in a high-heat dishwasher cycle. Third, inspect for damage. Discard any container that is cracked, warped, or has a strong odor; those flaws can harbor bacteria or compromise the plant’s environment. A small crack can widen with water and temperature changes, making the pot unstable. When you adopt these practices, you can confidently transform a simple baby food container into a sturdy, reusable pot for seedlings, herbs, and small houseplants.
In practice, the containers are especially well-suited to “short-term growth” projects. They work brilliantly for seed-starting stages where you want to observe germination and early root development without committing a larger pot. They also function nicely as sprouting starters for microgreens, where the shallow depth helps manage moisture and light exposure. As the plant matures, you can transfer it into a larger pot or into the ground if you have space, giving the plant a more generous rooting environment. This staged approach keeps your gardening routine economical and agile. It also means you can rotate crops on a compact windowsill, ensuring a fresh supply of herbs, greens, or decorative foliage throughout the growing season. The compact footprint of each pot encourages you to create a little urban garden that feels reachable and manageable, even for someone who has never kept a plant alive before.
When thinking about design, you can pair these simple pots with a few inexpensive trimmings to elevate their appearance while maintaining practicality. A light coat of paint on the outside, a small label, or a colored marker dot on the side can turn a plain pot into a cheerful display. Because the plastic is transparent, you can also observe the soil’s moisture level with ease, which helps in timing waterings more precisely. If you want to keep surfaces clean, place a small saucer underneath each pot to catch excess water. Aesthetics aside, the practical benefit remains the same: a compact, efficient system that minimizes waste while offering a stage for growth. In time, these tiny pots can become a familiar part of your environmental routine, a modest yet meaningful demonstration of how everyday objects can contribute to a more sustainable lifestyle.
For those curious about broader reuse methods beyond plant pots, consider exploring the full spectrum of ideas that exist for plastic container reuse. While the examples here focus on planting, the same principles of cleaning, hole-drilling for drainage, and careful handling apply to crafting organizers, travel-sized storage, or art projects. The idea is to treat each container as a potential resource rather than a disposable item. In this sense, your kitchen becomes a resourceful workshop where waste declines and creative solutions rise. The result is a home that feels lighter, more organized, and subtly more in harmony with the cycles of nature. The journey from a simple baby food container to a thriving mini-garden is a small but meaningful step toward a broader culture of reuse and care.
External resource: https://www.thespruce.com/creative-ways-to-reuse-plastic-containers-4155945
Small Packages, Big Packing Wins: Reimagining Baby Food Jars for Travel-Sized Toiletries and Medications
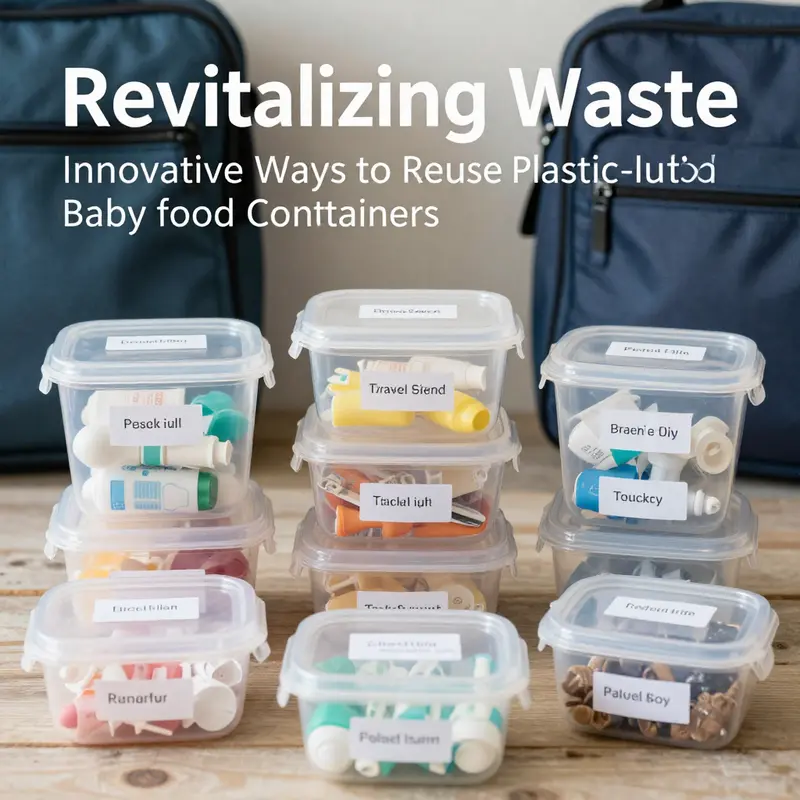
Tiny jars from baby food can be the quiet workhors of travel-ready packing. They carry a surprising amount of potential when repurposed thoughtfully, turning a common waste stream into compact, reliable organizers for toiletries, first-aid items, and everyday meds. This approach fits neatly into a larger ethic of reuse: take something that served a single purpose and reimagine it as a flexible space for essentials. The beauty lies in their size and shape. Most baby food containers are sturdy, clear, and won’t rollover in a bag, which makes them ideal for liquids and balms that you’d rather keep separate from your clothes and other gear. They also tend to be easy to clean, durable, and, when made from polypropylene or similar plastics, capable of withstanding repeated use without obvious wear. The overarching idea is simple: clean, label, seal, and stash. The details that follow help this simple concept become a dependable habit rather than a fragile workaround.
Before you begin, a quick note on safety and hygiene anchors the practice. If the container previously held food, thorough cleaning is essential. A warm, soapy rinse is a starting point, but for extra caution you can sanitize by soaking in a dilute bleach solution—one tablespoon of bleach per gallon of water—for about five minutes, followed by a thorough rinse and air-drying. This extra step minimizes the risk of cross-contamination when you reuse the jar for medications, vitamins, or personal care items. Even with sanitization, inspect each container for residue or odors; if anything seems off, it’s wiser to discard and replace rather than risk issues during travel. These steps aren’t just about hygiene; they’re about building trust with your own packing system so you reach for the jars with confidence rather than hesitation.
Size matters as you select containers for travel. The sweet spots are typically 2–4 ounces (60–120 milliliters). These volumes are large enough to hold a practical amount of shampoo, toothpaste, lotion, or liquid medications, yet small enough to slip into a carry-on kit without contributing to the infamous “liquids overload.” A rigid, leak-proof design is a must. Containers that feel flimsy or that yield to pressure in a suitcase aren’t worth the risk for liquids, even if the lid seems snug. The goal is to avoid surprises in transit: no messy spills in your clothes or your travel wallet. This practical sizing makes it feasible to create a mini, modular system of labeled jars that roll up neatly inside a toiletry pouch or packing cube. When you pick your containers, consider the shape too. A compact, cylindrical form is predictable and stackable, whereas irregular shapes often roll and shift in bags. The planner in you will appreciate a consistent lineup of small jars that can be reorganized quickly when new items are added or removed from your routine.
Labeling is the quiet backbone of travel efficiency. Clear, durable labeling helps you identify contents at a glance, which is essential when you’re juggling morning routines or late-night hotel rooms. Use waterproof labels or a permanent marker to note the content and the date opened, especially for medications. Color coding—red for medicine, blue for skincare, green for hair care—adds a visual shortcut that can be invaluable in a dim bathroom or a crowded suitcase. A folded card inside a packing cube listing what each color represents can serve as a quick reference, minimizing the chance of grabbing the wrong bottle in a rush. The labeling step also doubles as a safety check. If you’re storing medications, age, dosing instructions, and any special handling notes should be legible, even after travel. This is not just about organization; it’s about safeguarding health while on the road.
A practical packing ritual emerges when you consider how to prevent leaks and spills. Double-check the seal on each lid, ensuring it is fully closed and aligned. If the original cap feels loose, a tiny strip of tape across the lid can act as a belt-and-suspenders approach to reinforce the seal. For extra protection, place each container inside a small, resealable plastic bag. This secondary barrier is comforting when you’re squished in a car, train, or airplane seat, and it prevents a leak from spoiling a whole kit. Storing all the repurposed jars together in a dedicated pouch or packing cube makes a big difference too. It reduces rummaging and helps you keep track of what you’re taking, what you’ve used, and what might need restocking on the road. The goal is calm, predictable travel behavior, not frantic last-minute searches in a crowded suitcase.
In practice, these repurposed containers serve a broad range of functions beyond their original baby-focused intent. Medications—pills or small capsules—find a home in a dry, clean jar with a grippy lid that won’t pop off when the bag is jostled. Toiletries like shampoo, conditioner, hand sanitizer, toothpaste, and lotion fit the same mold, especially when you’re trying to reduce the risk of leaks by keeping products upright and contained. For families, these small jars can also hold essentials for babies and toddlers on the go, such as ointments or powders, provided they stay dry and are clearly labeled to prevent confusion with the other items in your kit. When you prepare for a longer trip, you can double the versatility by using one container for a specialized set—like a compact first-aid kit with tiny antiseptic wipes, small bandages, and a few lint-free swabs—without cluttering your luggage with separate packaging. The beauty is in the modular system: every jar becomes a micro-solution that slots into your larger travel routine with minimal fuss.
A clever extension of the core idea is to view containers not only as containers but as small, adaptable organizers in their own right. Some travelers cut away the top portion of a bottle or jar and repurpose the body as a seed of a larger organizational system. The concept echoes the broader reuse approach: shape, trim, seal, and stabilize to tailor the container to your exact needs. If you embrace this more hands-on adjustment, you’ll want to ensure any modifications remain food-safe and stable during travel. Hot glue or other sealing methods can be used to close seams created by a cut, but you should always test for any sharp edges and ensure that the final product remains leak-resistant. This more do-it-yourself path isn’t essential, but it offers an appealing way to customize your kit when you want something that fits a very specific travel pouch or a compact day bag.
The topic also nudges you to align with travel regulations. Airlines typically permit liquids in carry-on baggage when they’re in containers of 100 milliliters or less, and when all containers fit within a single liter—but rules vary by carrier and country. If you’re unsure, a quick check before you pack can save time and stress at the security line. The practical upshot is that your two- to four-ounce jars are not just convenient; they’re often more compliant with common airline liquid allowances, provided you manage the total volume as a kit. This is a small but meaningful way to keep travel smooth and predictable, especially when you’re juggling kids, luggage, and the logistics of movement through busy hubs.
To weave everything together, consider the internal reuse step that has become a practical touchstone for many travelers: the concept of organizing with a purpose-built set of tiny jars makes your routine feel less like a frenzied scramble and more like a practiced system. A good example of this approach is the idea of using compact, clearly labeled jars as the backbone of a travel kit, with each jar serving a distinct function and a dedicated lid that seals tightly. For readers who want a concrete path to try, a compact, ready-to-reference resource presents a pictorial guide to small-container repurposing and storage elegance. You can explore a detailed product page that demonstrates how small, versatile containers can be repurposed for snacks, medicines, and other travel essentials, and you can access it here: senang-kraft-paper-octagonal-bowl-pet-lid-waterproof-eco-friendly-disposable-customizable-snack-pet-food-salad-containers-1l. While this link is primarily about a specific container design, it embodies the ethos of scalable, durable, and reusable packaging that travels well and reduces waste. It’s a reminder that the way we choose and configure our containers matters just as much as the contents themselves. The broader practice—clean, label, seal, and shop for a modular system—can be adapted to almost any travel scenario, from day trips to longerfamily vacations.
As a final note, a wider world of ideas awaits beyond baby-food repurposing. If you want to explore additional, creatively packaged storage options and safe, practical reuse methods, a well-regarded craft and upcycling resource offers extended guidance and step-by-step ideas for reusing jars and other common containers. This external resource presents broader strategies for turning everyday plastics into helpful, long-lived travel companions. For convenience, you can consult this external guide here: https://www.thesprucecrafts.com/reuse-plastic-jars-4120857. It broadens the horizon beyond the specifics of baby-food jars and gives you a framework you can apply to any small container you encounter on your path toward sustainable living. The overarching takeaway remains constant: reuse, refine, and reorganize until your travel kit feels simple, sturdy, and ready for whatever the road throws at you.
From Purée to Pantry: Reimagining Plastic Baby Food Containers for Safe, Sustainable Portions
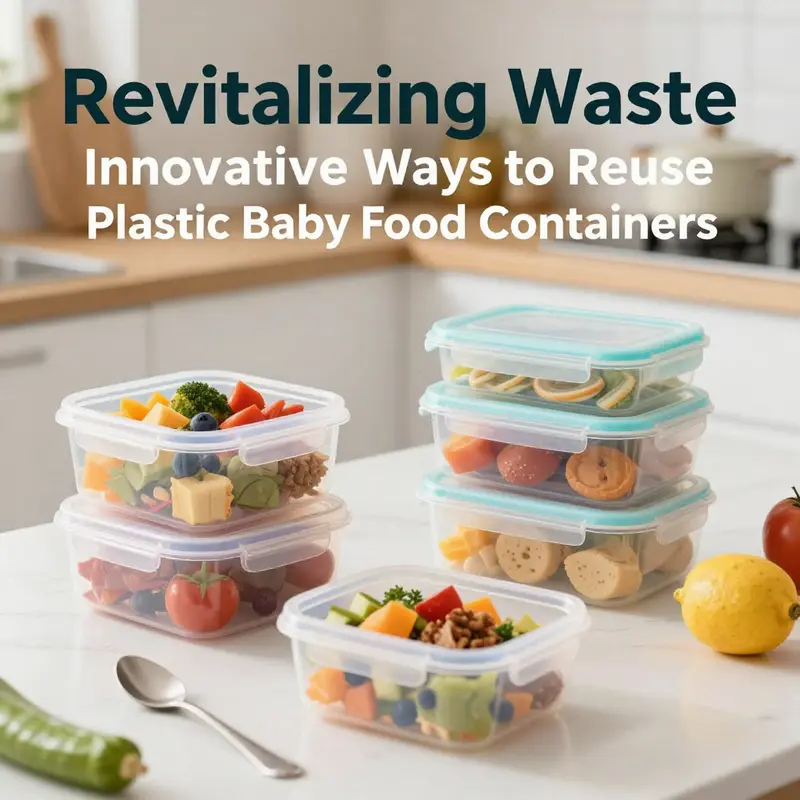
The small, familiar jars that once held baby purée can become a surprisingly versatile ally in a kitchen dedicated to mindful living. Reusing plastic baby food containers for portioning baby food or snacks isn’t just a clever hack; it’s a philosophy in miniature, a tangible way to shrink waste while supporting your family’s health and routine. When you approach these containers with care, they reveal a quiet durability and a transparency that simplifies meal planning. The same sturdy shells that kept puree fresh during a toddler’s first months can become the backbone of a more organized, lower-waste approach to feeding a growing child. And because these containers are typically made from durable plastics like polypropylene, they offer a practical balance of lightweight design and resilience that can handle daily use—provided we treat them with respect for safety and longevity.
Safety first is more than a rule of thumb; it’s a practiced mindset. Many baby food jars are marked with a recycling code that points to a specific plastic family. In most cases, a PP designation—often labeled as #5—signals a plastic that is more resilient to handling than some other food-grade plastics. It’s important to note, though, that even with a favorable material designation, repeated use under heat can degrade plastic and compromise safety. The instinct to reheat directly in the container is tempting, especially on rushed mornings, but best practice is to avoid microwaving or heating these containers if they are to be used again for food. A simple swap—storing prepped portions in the container and warming the portion in a separate dish—can preserve both safety and flavor while extending the life of the container. If the container is ever warped, cracked, or carries a strong, sour odor after cleaning, it’s time to retire it. These signs aren’t just cosmetic; they can indicate micro-fractures that harbor bacteria or compromise the container’s integrity.
Cleaning takes center stage in any reuse plan. Thorough washing is non-negotiable, especially when the container has previously held foods for a baby. Begin with warm, soapy water, paying attention to the lid and any grooves where residues can linger. A gentle brush helps reach those tiny crevices where purée once clung. Rinse well, and then air dry completely before storage. For households that prepare batches of homemade purée, an extra step—sterilizing by boiling for a few minutes or running through a dishwasher with a heated drying cycle—can provide added assurance. Although heat can degrade plastics over time, many modern baby containers withstand brief exposure when used sparingly for non-heated storage. The key is consistency: never reuse a container that doesn’t look or smell right, never rely on the container for hot substances, and never assume the container is still perfectly safe after a rough tumble or drop. The practical benefit is immediate and tangible: you’ll know the exact contents by sight, thanks to the clear plastic, and you’ll be reminded to handle each container with fresh care after every use.
The heart of this practice lies in portioning, which helps families control intake and reduce waste. When you portion baby food or snacks into these containers, you create a dependable system that travels well from kitchen to stroller to school bag. For younger babies, small portions of homemade purees can be frozen in the containers themselves and then popped out as needed. Freeze the portions flat to save space, then transfer to a labeled freezer bag for long-term storage. When you need a serving, place the container in a quick thaw—perhaps in warm water or at room temperature—so it’s ready when hunger strikes. Labeling is your friend here. A simple sticker or marker noting the date and the food content makes it easy to track freshness and minimize waste.
For families with toddlers exploring varied textures, these containers can host a spectrum of snack portions. Dry foods like cereal, crackers, or soft fruits such as blueberries fit neatly into the clear compartments, which makes it easy for both parent and child to see what’s inside. The transparency is more than aesthetics; it’s a practical cue that helps a child identify and select their own snacks. In this way, the containers double as tiny teaching tools, encouraging autonomy and familiar routines without the clutter of multiple small, mismatched containers. They also simplify travel. A small, uniform container in a diaper bag keeps snacks tidy, prevents crushing, and promotes a calmer, more predictable feeding environment during outings.
Beyond food, the containers shine in organization. Their compact shape and compatible lids allow them to function as micro-pantry organizers, a concept many parents find surprisingly freeing. You can create a child-sized pantry on a kitchen shelf or a playroom cabinet. Label each container with a simple word or a picture to guide a child in helping to put away their snacks, which is a gentle way to introduce early literacy and responsibility. In a home that values sustainable habits, even the way you name and sort items carries educational value: it reinforces ordering, classification, and the pride that comes from contributing to household routines.
To maximize the life of each container, consider the shift from single-use convenience to repeatable, mindful use. A single, well-maintained container can be the backbone of a weekly planning system. For example, a batch of homemade purée can be portioned into several containers, each labeled with the date and the intended contents. As portions are consumed, you’ll notice patterns: which purées get used first, which textures your child accepts at different ages, and how your storage cadence affects overall waste. Tracking these patterns helps you refine batch sizes and reduces the chance of forgotten leftovers turning into waste. It’s a quiet, ongoing process, but one that yields both environmental and budgetary benefits.
The concept of a DIY “pantry” for your child can be as simple as a shelf or basket where clearly labeled containers sit within easy reach. Picture a small, kid-friendly setup: containers lined up in a neat row, lids aligned, each with an image of the food inside. When your child learns to participate in snack selection, your goal becomes less about policing every bite and more about guiding a growing sense of independence and responsibility. The act of choosing a snack, opening a container, and returning it to a specific spot becomes a gentle lesson in organization, time management, and self-care—all while reinforcing healthy eating habits.
Of course, this reuse journey is not merely about keeping waste out of landfills. It’s also a practical answer to daily logistics. The cost savings can accumulate, especially for families who batch-cook and freeze in advance. By using containers you already own, you minimize the need to purchase new storage solutions, which is a straightforward way to reduce household expenses. The environmental payoff extends beyond the household pantry as well. Choosing to reuse these containers reduces the demand for new plastics, and while recycling remains essential, extending the life of an item before it is recycled is a key component of a circular economy. Small acts, repeated over time, become substantial shifts in how a household interacts with waste and resources.
If you’re seeking step-by-step inspiration that takes these ideas from concept to practice, a well-regarded resource offers a detailed approach to repurposing these containers into snack packs. Consider checking out Upcycle Plastic Baby Food Containers into Snack Packs. It provides a practical, user-friendly framework that complements the principles described here. As with any DIY project, adapt the guidance to your family’s needs. Some households may want slightly larger portions or a different labeling system; others may prioritize speed and simplicity on busy mornings. The beauty of this approach is its adaptability, not its rigidity. The containers do not demand a single method; they invite you to tailor the process to your routines, tastes, and values.
A final note on scope and safety completes the loop. When you reuse these containers for food, you are stepping into a space where care and practicality intersect. Avoid heating contents directly in the same container if you intend to reuse it for food. If you do heat, do so only in a separate vessel, then portion back into the container after cooling. Inspect for wear and tear regularly. If a container shows cracks, warped shapes, or lingering odors that won’t fade with thorough cleaning, retire it. A damaged container can harbor bacteria or release degraded plastics into food, an outcome no one wants. With mindful handling, these jars can become more than a storage solution; they can become a small, daily demonstration of sustainable living in action.
In a world of disposable habits, reimagining what we already own can be a powerful act. The humble baby food container, once destined for the recycle bin after a single use, becomes a partner in daily meals, a tool for teaching independence, and a sturdy ally in the shared effort to minimize waste. The narrative is simple, but its impact is meaningful: fewer jars wasted, less clutter, accessible portions, and a kitchen that respects both taste and the planet. By embracing careful cleaning, safe reuse, and thoughtful organization, you transform a familiar, modest container into a durable, adaptable system for feeding your child—today, tomorrow, and long into the years of growing independence. If you’d like to see how others have turned these small jars into practical snack packs, explore the linked guide and then adapt its ideas to your family’s rhythm. The path from purée to pantry is shorter than you might think, and the payoff—cleaner storage, calmer mealtimes, and a lighter footprint—speaks for itself.
External resource: For additional ideas and practical steps beyond the home kitchen, you can explore The Spruce’s thoughtful compilation of reusable plastic container ideas, which echoes many of the principles discussed here. https://www.thespruce.com/creative-ways-to-reuse-plastic-containers-4155945
Tiny Containers, Big Creativity: Reimagining Plastic Baby-Food Jars for Art, Play, and Practical Living
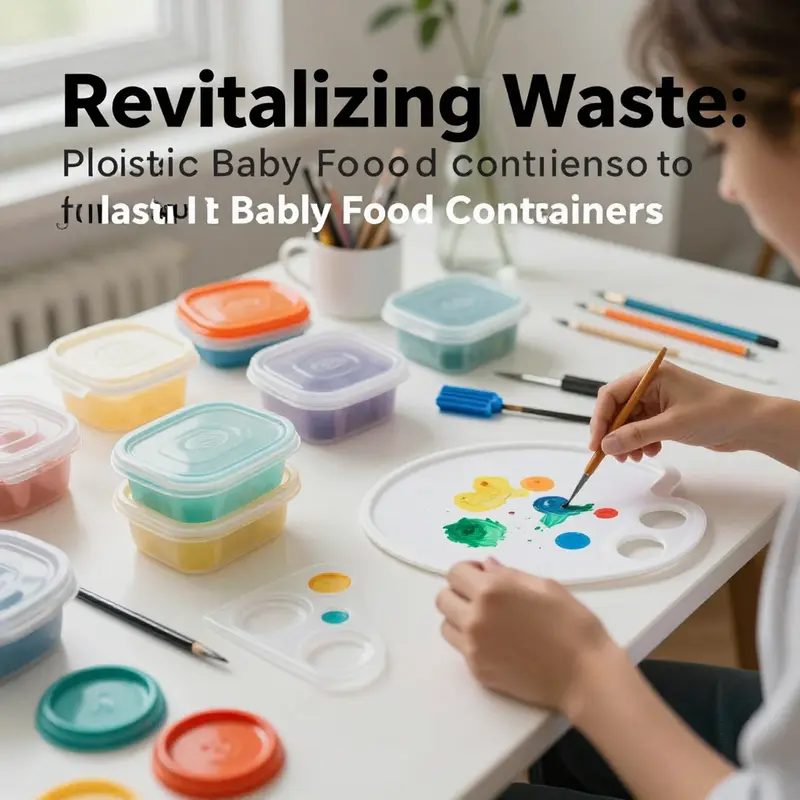
When a tiny plastic container from a baby food jar lands on the counter, it might seem like a disposable misstep. Yet these little shells are often built from sturdy, durable plastics that can be repurposed in surprising ways. The key is recognizing the container’s potential beyond the stage of feeding a child. Clean, dry, and undamaged, these jars become flexible tools rather than waste. Reusing them is a practical, low-waste habit that can spark imaginative projects, support early learning, and even teach children how to care for resources. The philosophy behind this approach is simple: containment and curiosity are already built in. The uniform shape, clear walls, and reliable lids make baby food containers surprisingly versatile. They offer a compact, predictable canvas for art, storage, and small-scale experiments, while keeping family life organized and environmentally minded. The practical logic is clear: reuse preserves materials and reduces the number of items that end up in landfills, while still meeting daily needs in clever, cost-effective ways. This is not merely about saving a few plastic bits; it is a mindset that reframes everyday objects as part of a circular, hands-on upbringing for both kids and grown-ups.\n\nA core pillar of reuse is recognizing the material properties of these containers. Most baby food jars are made from durable plastics that are BPA-free and designed to withstand repeated use. Many are polypropylene, commonly labeled as #5 on the recycling code. This material is known for being relatively heat-resistant and able to stand up to washing and light use in non-food contexts. That said, safety matters, especially when a container has previously touched food. Thorough cleaning is non-negotiable, and it’s wise to inspect for cracks or warping before deciding how to repurpose. If you intend to reuse a container for food again, you’ll want to be especially cautious about heat exposure. Heat can degrade plastic over time and may release unwanted substances, even from BPA-free options. For art projects or storage solutions that don’t involve food, the safety thresholds are more forgiving, which broadens the range of creative applications.\n\nWith that groundwork, the chapter unfolds as one continuous practice rather than a catalog of separate ideas. Start by treating each container as a tiny, reusable blank. Its strength lies not in novelty alone but in how easily it can be transformed without specialized tools. A clean, dry container can become a mini canvas. Children can decorate the exterior with markers, stickers, or paper collage. The smooth surface invites experimentation with paint—watercolor washes for a translucent, layered look or acrylics for bolder color blocks that dry quickly on plastic. The outcome is a personal artwork that can hang on a wall, brighten a desk, or accompany a book as a portable study aid. When used this way, the container doubles as both an art surface and a storage unit for small art supplies, turning one object into a dual-purpose tool that supports creativity and organization.\n\nBeyond painting, the containers invite tactile, sensory play. Filling them with materials such as rice, pasta, dried beans, or lentils creates miniature sensory bins perfect for toddlers and preschoolers. The containers’ clear walls allow young learners to observe color and volume, while the lids—kept or modified—provide a secure seal that encourages shaking, tipping, and pouring. A shared activity, such as sorting colored buttons or beads into several containers, can become a foundational classroom-like exercise at home. It blends fine motor development with early math concepts like counting, sorting, and pattern recognition. The physicality of moving objects from one jar to another also reinforces hand-eye coordination and spatial awareness. When designed with care, this simple setup becomes a quiet, focused space that supports concentration and curiosity.\n\nAnother meaningful application is seed starting and small planting projects. Those same jars can serve as seedling pots for herbs, flowers, or succulents. A few drainage holes drilled in the bottom, a modest layer of gravel or sand for drainage, and a light potting mix are all that’s needed to create tiny, portable planters. Children learn about plant life cycles as they monitor germination and growth. Labeling each container with plant names using stickers or a permanent marker helps build early literacy and organizational skills. As seedlings mature, you can transplant them into larger pots or a garden bed, keeping a little calendar to track watering and sun exposure. The act of caring for living things transforms a simple container into a gateway for science, responsibility, and a connection to the natural world.\n\nBut the repurposing toolkit extends well beyond gardens and classrooms. These jars excel as craft storage jars, especially for small supplies that tend to scatter when placed loose in a drawer. Beads, pom-poms, buttons, and yarn scraps find a home in a stack of clear shells. The uniformity of their size makes them ideal for labeling and stacking, turning a cluttered craft area into an organized workspace. When you remove the lids, the jars form a modular system that can be arranged on a shelf or inside a drawer to maximize space. A simple label on each jar converts a chaotic collection into an accessible library of materials, a resource that speeds up creative sessions and reduces the time spent hunting for the right piece. This same logic scales up for older kids and adults who enjoy DIY projects, as the small, predictable form factor is perfect for organizing tiny components in any project—from jewelry making to model-building.\n\nSpeaking of jewelry and display, the clear plastic walls present an unexpected display case for keepsakes and mini collections. A jar can hold tiny charms, shells, or pressed flowers, turning the container into a floating gallery of small treasures. When the lid is kept, the jar can be sealed to protect delicate items from dust. The outside becomes a playful canvas for decorative techniques such as decoupage or light-glazing to give it a subtle sheen. In a child’s room or craft corner, these jars can become a rotating display of seasonal decorations or a mini gallery of summertime memories. The same approach works for displaying stickers or stamps, where the jar’s transparent sides let the contents become a visual centerpiece while also remaining functional as a storage unit.\n\nCreativity also takes a musical turn with DIY wind chimes. By attaching strings or lightweight cords to the lids of cleaned containers and suspending them from a branch or ceiling hook, you turn a stack of jars into a gentle, tinkling installation. Small bells, beads, or decorative buttons can add texture and sound, encouraging children to listen to how different materials create different tones when moved by wind. This kind of project blends art with a tactile science of acoustics, inviting discussion about sound, movement, and rhythm. For a quieter corner of the home, these wind chimes offer a gentle ambient feature that can calm a child during quiet time or serve as a charming party accent.\n\nA more whimsical transformation involves miniature dollhouse furniture. Round containers become coffee tables, while rectangular ones can serve as dressers, storage chests, or small seating options after a bit of sanding and paint. Fabric scraps, paper, and glue can be used to add texture and character, providing a hands-on reminder that ordinary objects can be repurposed into practical playthings. These projects foster problem-solving and spatial reasoning as children imagine how to fit shapes together and how to decorate to reflect a chosen theme. The same logic applies to pedagogy and play-based learning at home or in a classroom setting where simplicity, resourcefulness, and imagination drive the curriculum.\n\nAs a final flourish, the containers can be repurposed as educational tools for sorting games, counting activities, or color recognition tasks. Their transparent walls become a visual aid for early math and science, enabling quick demonstrations of volume, quantity, and pattern. A parent can guide a child through a color-sorting exercise by filling several jars with differently colored beans or beads, then inviting the child to match shapes or numbers to the hues. The containers’ small footprint keeps activities close at hand and reduces visual clutter, helping children stay focused on the concept being taught. The end result is a blended learning moment that merges creative craft with practical learning in a single, accessible object.\n\nTo maintain the integrity of reuse, a few important considerations thread through every project. Always perform a thorough cleaning before reusing, particularly if the container previously held food. Check the recycling code—containers marked with #5 (PP) are generally suitable for reuse, but avoid those that have been exposed to high heat. Inspect for cracks, warping, or persistent odors; discard any container that shows damage or smells odd, as it may not be safe for continued use. When using containers for food-related purposes again, prioritize gentle cleaning and avoid heating in microwaves to minimize any risk of material degradation. For non-food uses, the safety thresholds relax, so the doors open to more color, texture, and tactile experiments without compromising safety.\n\nIn this chapter’s spirit of mindful repurposing, the aim is not to shun new materials but to reframe what already exists in our homes. The small, familiar baby food container becomes a flexible foundation for a wide range of activities—art that decorates a room, storage that keeps supplies organized, gardens that teach responsibility, and playful structures that spark storytelling and design. By weaving together practical organization with imaginative exploration, these jars grow into more than their original purpose. They become touchstones of sustainable living, a reminder that the path to greener households often travels through small, intentional choices—like choosing to wash, dry, and repurpose a container rather than tossing it away. This approach aligns with broader environmental goals while enriching daily routines with texture, color, and hands-on learning.\n\nFor readers seeking a practical reference that extends beyond the home, consider exploring succinct packaging ideas and compact container options that pair well with small-scale crafts. One relevant product page offers a compact, affordable option for everyday use, and it can serve as a bridge between repurposing and new-purchase decisions in a sustainable toolkit. See the reference here: senang01-best-price-8oz-double-packaging-plastic-free-single-wall-craft-paper-food-grade-disposable-cup-for-wine-mineral-water. This link points to a resource that reinforces the idea that even commercial packaging can inform home reuse strategies without sacrificing safety or practicality. And, of course, when you downsize to a new practice, remember to keep the conversations with children ongoing about why reusing matters. Let them participate in cleaning, labeling, and planning which containers will become which projects. The shared experience not only builds skills but also reinforces environmental stewardship as a family habit.\n\nExternal resource: For a broader perspective on reusing plastic containers in creative ways, see The Spruce’s guide to repurposing plastic containers, which offers additional ideas and practical tips that complement the hands-on approaches described here. https://www.thespruce.com/creative-ways-to-reuse-plastic-containers-4155945
Final thoughts
Repurposing plastic baby food containers can significantly enhance the sustainability practices of food service businesses. By transforming these containers into useful tools — from storage for craft supplies to creative planters and travel cases — businesses can effectively reduce waste and promote an environmentally-conscious image. Such innovative reuse not only helps in minimizing costs associated with purchasing new supplies but also aligns with growing consumer demand for sustainable methods. As you explore these various applications, you can take meaningful steps toward a greener future.